Planning a large party? Learn a simple rent-vs-buy rule, a 3-minute cost formula, and a practical checklist of decor to buy in bulk vs rent (arches, linens, ...
Gathova
Budget Ceiling Draping With Tulle and Fishing Line

Joanna Mercer
Joanna Mercer is an enthusiastic DIY event decorator and the creative spirit behind Gathova's party guides. With years of hands-on experience designing stunning tablescapes, balloon garlands, and custom photo backdrops for friends and family, she specializes in accessible, budget-friendly celebrations. Joanna loves sharing her practical tips and crafting tutorials to help anyone turn an ordinary space into a memorable party venue.
Published · Last updated
The first time I tried ceiling draping, I was convinced it would either look like a wedding tent or a tangled spiderweb. It can absolutely be the dreamy tent effect, even on a normal-person budget, but only if you plan two things first: where the tension will go and what your venue will allow. Lightweight tulle and nearly invisible fishing line are my go-to combo because they give you maximum drama with minimal weight, which is exactly what you want overhead.
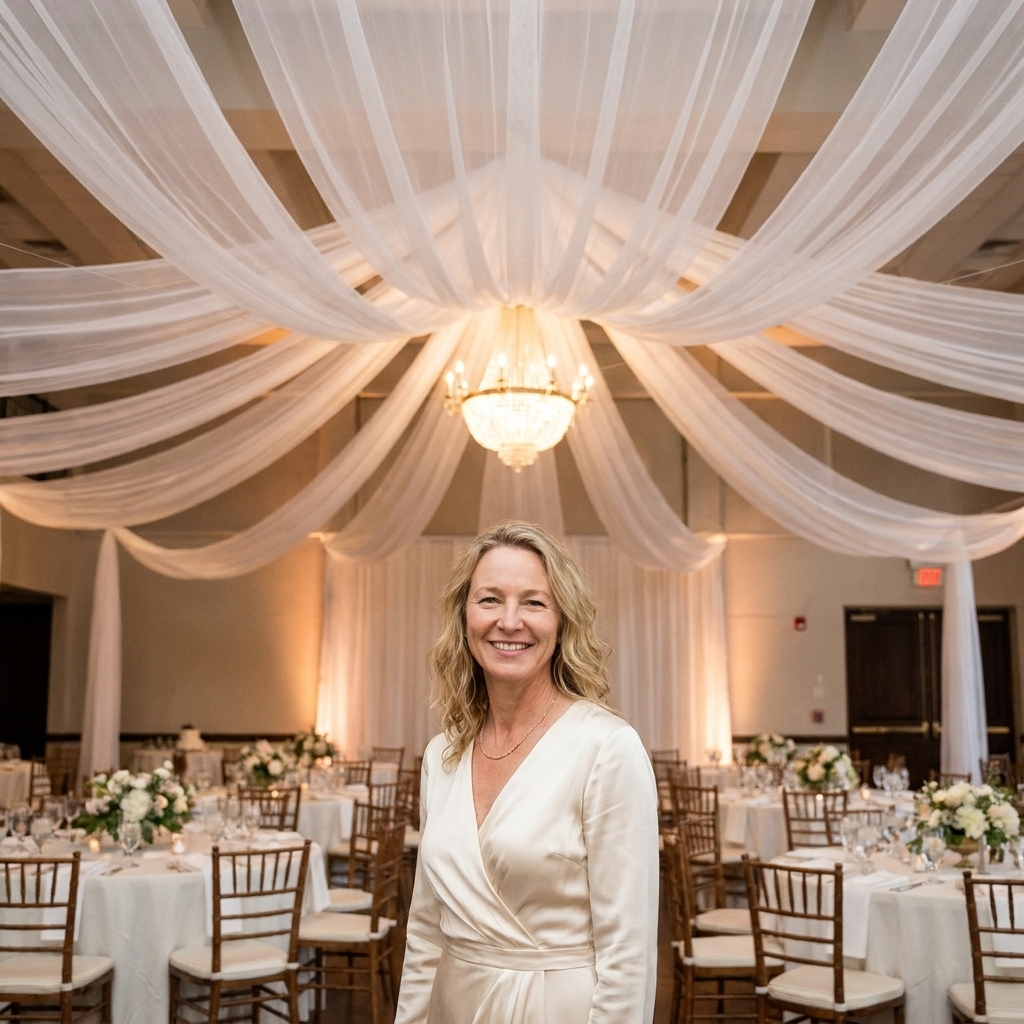
This guide walks you through safe, rental-friendly ways to hang tulle with fishing line, how to get those swoops to look intentional, and how to avoid the classic mid-party sag.
Safety and venue rules first
I know, I know. We want pretty. But anything over guests needs a quick reality check. Before you buy a single spool of line, do these steps.
1) Get permission and identify what you can attach to
- Best case: exposed beams, sturdy hooks already installed, or venue-approved rigging points.
- Common case: drywall ceiling where you cannot use nails or screws. You will need removable adhesive solutions, or you will anchor to walls, columns, or freestanding stands instead.
- No-go: fire sprinklers, sprinkler pipes, smoke detectors, exit signs, HVAC vents, or light fixtures. Do not drape across them or attach anything to them.
If you are in a public venue, it can help to skim basic fire and life-safety guidance from the National Fire Protection Association so you understand why venues get strict about sprinklers and ceiling decor. You do not need to become an expert, just respect the big rules.
2) Keep everything lightweight
This tutorial is for tulle and fishing line only. If you add heavier fabric, chandeliers, faux greenery, disco balls, or balloon clusters, your attachment plan must change. Fishing line can be strong for its size, but your anchors are usually the weak point, not the line.
3) Plan for fire rules and heat
Keep draping well away from candles, chafing dishes, heat lamps, and hot stage lights. If you want candlelight ambiance, I strongly prefer enclosed hurricanes, LED candles, or moving the glow to the tables instead of the ceiling.
Also, some venues require flame-retardant (FR) fabric or documentation that the fabric meets a standard like NFPA 701. Others ban ceiling decor entirely. Venue policy wins, even if your plan is lightweight.
4) Do not do this solo on a ladder
Ceiling work is awkward, even when it is “easy.” If you can, recruit at least one helper and take turns being the spotter. Slow is smooth, and smooth is safe.
What you need (and what to skip)
Materials
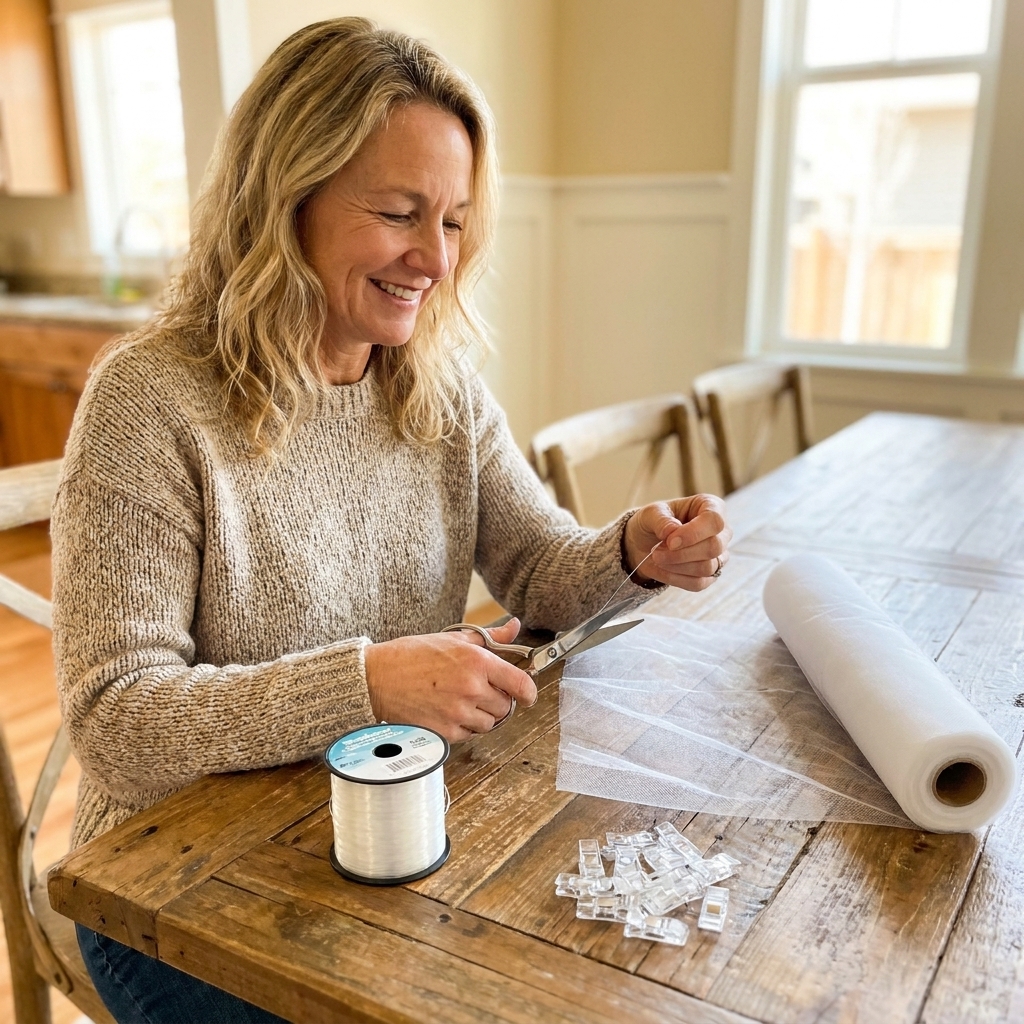
- Tulle: 54 to 72 inch wide rolls are easiest. Matte tulle photographs softer than shiny tulle. Softer illusion-style tulle drapes more gracefully than very stiff craft tulle.
- Clear fishing line: 20 to 50 lb test is a practical range for decor structure. Test ratings are not safety ratings, and knots reduce strength, so build in a wide margin and avoid sharp edges that can nick line.
- Removable attachment option: choose one based on your ceiling and venue rules (more on this below).
- Scissors and step stool or ladder.
- Painter’s tape for temporary marking.
- Small binder clips or mini clothespins for quick adjustments.
Helpful extras
- White gaffer tape (great on walls and poles, less residue than duct tape in many cases).
- Zip ties (for attaching line to stands, truss, or railings).
- Gloves (fishing line can burn your fingers when you pull tension).
Skip these common mistakes
- Regular scotch tape as your main anchor. It fails fast.
- Attaching tulle directly with adhesive when you can avoid it. Adhesive grips line better than fabric, and line lets you re-swoop without ripping.
- One-point hang with everything tied to a single weak hook. Spread load across multiple anchor points.
Budget math: how much to buy
Here is the simple way I estimate yardage without making it a spreadsheet nightmare.
For the classic tent look
You are usually running multiple lengths from a center point out to the perimeter. For each length:
- Measure: center point to anchor point distance.
- Add: 2 to 4 feet for tying and for a deeper swoop.
Example: If the center-to-wall distance is 12 ft, plan 14 to 16 ft per swag.
How many swags?
These ranges depend on ceiling height and how dense you want it to feel.
- Small room (10 to 14 ft wide): 6 to 10 swags looks full.
- Medium room (15 to 25 ft wide): 10 to 16 swags.
- Long rectangular rooms: do two center points in a line (two tents) instead of forcing one center to cover everything.
Fishing line amount
Plan one fishing line spoke per swag, plus extra for a perimeter line if you are creating a rectangle or oval outline. I like to buy at least 25 percent more than my estimate because line disappears into bags and knots get cut off.
Choose a hanging method
Your method depends on what you are allowed to touch. These are the approaches I use most, from most secure to most rental-friendly.
Option A: Existing hooks, beams, or rigging points
If your venue has real anchor points, use them. Tie fishing line to anchors and use the line as your structure. The tulle gets attached to the line, not the ceiling.
Option B: Drop ceiling grid (only with permission)
Some venues allow you to loop line around the metal grid. Many do not, because grids and tiles are not engineered for decor loads and tiles can shift or pop out. If allowed, keep tension very gentle, avoid pulling on tiles, and follow the venue’s preferred method. Some spaces require ceiling-grid clips rated for that use.
Option C: Removable adhesive hooks on smooth surfaces
Removable adhesive hooks can work for very lightweight installs on smooth, clean surfaces with fully cured paint. Results vary with paint type, texture, humidity, and cure time. Many adhesive products are not rated for ceilings, so read labels, follow instructions exactly, and do a test hook in an inconspicuous spot first. When in doubt, anchor to walls, not overhead.
Option D: Freestanding drape stands or backdrop frames
If the venue will not let you attach to the ceiling at all, build your ceiling look from the ground up. Use two to four tall stands around the perimeter and run fishing line between them overhead. Then drape tulle across the lines. It reads like a ceiling installation in photos, but nothing touches the ceiling.
If you are deciding whether to rent stands or buy them, this is the exact kind of scenario I talk about in Rent vs Buy Event Decor for Large Parties.
Step by step: tent swoops
This is the system that gives you that soft, symmetrical, someone-paid-a-lot-for-this ceiling.
Step 1: Pick your center point
Stand in the room and choose the center visually, not just mathematically. If there is a chandelier or a ceiling feature you cannot cover, shift your center so your draping frames it instead of fighting it.
Mark the center spot on the floor with painter’s tape. This becomes your reference point for symmetry.
Step 2: Plan anchor points around the perimeter
Walk the room and choose 8 to 16 perimeter points. Try to space them evenly. Corners are great anchor points because they hide hardware and naturally hold tension.
- Tip: If the room is rectangular, add more points along the long sides so the swags do not look stretched.
Step 3: Install your structure with fishing line
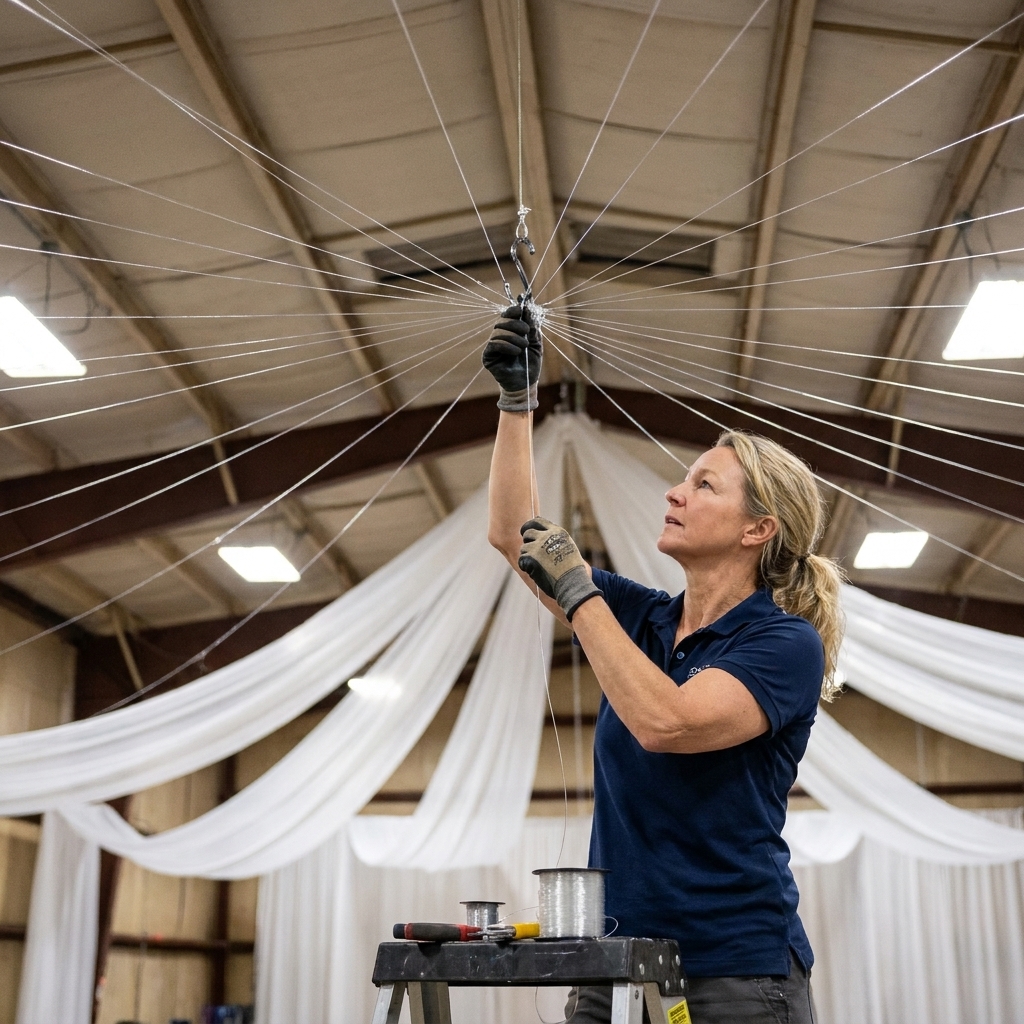
Run fishing line from the center to each perimeter anchor like spokes on a wheel.
- Attach at the center: Use a sturdy center anchor if you have one. If you are doing the freestanding stand method, create the center by tying multiple lines to a small metal ring, curtain ring, or carabiner that is appropriate for the job. Keep it lightweight and secure, and do a firm pull test before fabric goes up.
- Pull to the perimeter: Keep each line gently taut, not guitar-string tight. Check for sharp edges where line could rub.
- Match tension: Step back every few lines and look up. Even tension is what makes the final canopy look clean.
Knot note: Knots reduce line strength. I use a simple improved clinch knot or a surgeon’s knot with multiple wraps, then I inspect for nicks and give it a solid pull test.
Step 4: Add tulle to the lines, not the ceiling
Cut tulle lengths based on your earlier measurements. For each swag:
- Gather one end of the tulle like you are holding a bouquet stem.
- Tie or clip it to the center point around a fishing line bundle.
- Walk the tulle out along its fishing line spoke.
- Create the swoop by lifting the middle and letting it fall into a soft U shape.
- Secure the end at the perimeter point with a knot, clip, or a small zip tie.
Repeat all the way around, alternating sides so the weight stays balanced as you work.
Step 5: Fluff, layer, and hide mechanics
- Layering: Two thinner tulle lengths on one spoke usually looks fuller than one thick bundle.
- Twist for texture: Give a length a gentle twist before you attach it. It adds dimension in photos.
- Hide the center: You can gather the center with a small bundle of extra tulle wrapped like a rosette. Keep it lightweight.
Keep tulle from sliding
Fishing line is slick, which is why it disappears, but it also means fabric can migrate over time. My fixes are simple and low-profile.
- Use tiny zip ties as stops on the line where you want the tulle to sit.
- Make a couple of half-hitches with the tulle around the line before tying off at the perimeter.
- Clip, then tie: Use a mini binder clip to hold your swoop while you adjust. Once you love it, replace clips with knots or zip ties so nothing heavy is hanging overhead.
Style upgrades on a budget
If you want the draping to look extra intentional without adding much cost, these are my favorite upgrades.
Add a perimeter frame line
Run one fishing line rectangle (or oval-ish shape) around the room perimeter first, then attach your spokes to that. It helps keep spacing even and reduces pull on individual anchors.
Use color strategically
- White or ivory: brightest, airiest, best for low ceilings.
- Blush or champagne: warm and romantic, still light-reflective.
- Black tulle: dramatic, but it reads heavier. Use more lines so it does not droop.
Coordinate with tables
Ceiling draping is a big visual moment. Tie it together with simple table elements in the same tone. If you are building centerpieces on a budget too, you might like the ideas in Thrift Store Decor Flips: 9 High-End Event Props.
Troubleshooting
My swags look uneven
- Check that your spoke lines are the same length or at least have the same tension.
- Adjust one swag at a time, stepping back after each change.
- In rectangular rooms, accept that swags to the long sides may need slightly deeper swoops to look balanced.
Everything keeps sagging
- Your anchors may be slipping. Reinforce with a better attachment method or add more anchor points.
- Reduce weight by splitting one thick bundle into two lighter layers.
- Humidity can relax fabric. Build in slightly more tension if you are in a damp space, but never so much that you risk adhesive failure.
The fishing line is showing in photos
- Move the line above the fabric by attaching tulle so it hangs under the line.
- Use a slightly thinner test line, but do not go so thin that it cuts into anchors.
- Soften overhead lighting if possible. Hard downlights make line sparkle.
The room has sprinklers or lots of obstacles
Do not weave around sprinklers. Instead, use the freestanding stand method and keep your canopy lower than the obstacles, or shift your canopy to one zone like over the dance floor or gift table.
Quick takedown plan
Future-you at 11:30 pm will thank you for this.
- Remove tulle first: Untie or unclip each swag and drop it into a bag. Do not yank.
- Wind fishing line as you go: Wrap it around a piece of cardboard so it does not become an unholy snarl.
- Take down anchors last: Especially adhesive hooks. Follow removal instructions slowly to protect paint.
- Do a ceiling scan: Look for stray line pieces. Clear line on the floor is a tripping hazard.
FAQ
What pound test fishing line should I use?
For lightweight tulle, I typically use 20 to 50 lb test. It is workable, it stays fairly invisible, and it usually holds up well for decor structure. Remember that knots reduce strength, abrasion matters, and your anchor points are often the limiting factor.
Can I use adhesive hooks on a ceiling?
Sometimes, but ceilings are tricky because paint, texture, dust, and gravity are working against you. Many adhesive hooks are not rated for ceiling use. If you do use them, follow directions exactly, respect cure times, keep the installation extremely lightweight, and test in an inconspicuous spot. When in doubt, anchor to walls or use freestanding stands.
How do I make it look fuller without buying more fabric?
Create deeper swoops, add gentle twists in a few swags for dimension, and make sure your spacing is not too wide. Fullness often comes from shape and repetition, not just yardage.
Is tulle flammable?
Many tulles are synthetic and can melt or burn near heat. Keep draping away from flames and hot fixtures, and follow your venue’s fire safety rules. For some public venues, FR requirements or standards like NFPA 701 come into play, so ask before you hang anything.
One last Joanna tip
If you take nothing else from me, take this: build your structure first, then add fabric. Fishing line is your invisible skeleton. Tulle is just the pretty dress on top. When you separate those jobs, your canopy gets cleaner, safer, and so much easier to tweak.
If you want more ways to stretch your decor budget beyond the ceiling, browse Budget Party Hacks. I keep all my best looks-expensive, costs-less tricks there.