Make a full, pro-looking organic balloon arch that holds its shape from Friday setup through Sunday. Includes balloon counts, supplies, structure tips, stora...
Gathova
Plastic Tablecloth Photo Backdrop That Looks Expensive

Joanna Mercer
Joanna Mercer is an enthusiastic DIY event decorator and the creative spirit behind Gathova's party guides. With years of hands-on experience designing stunning tablescapes, balloon garlands, and custom photo backdrops for friends and family, she specializes in accessible, budget-friendly celebrations. Joanna loves sharing her practical tips and crafting tutorials to help anyone turn an ordinary space into a memorable party venue.
Published
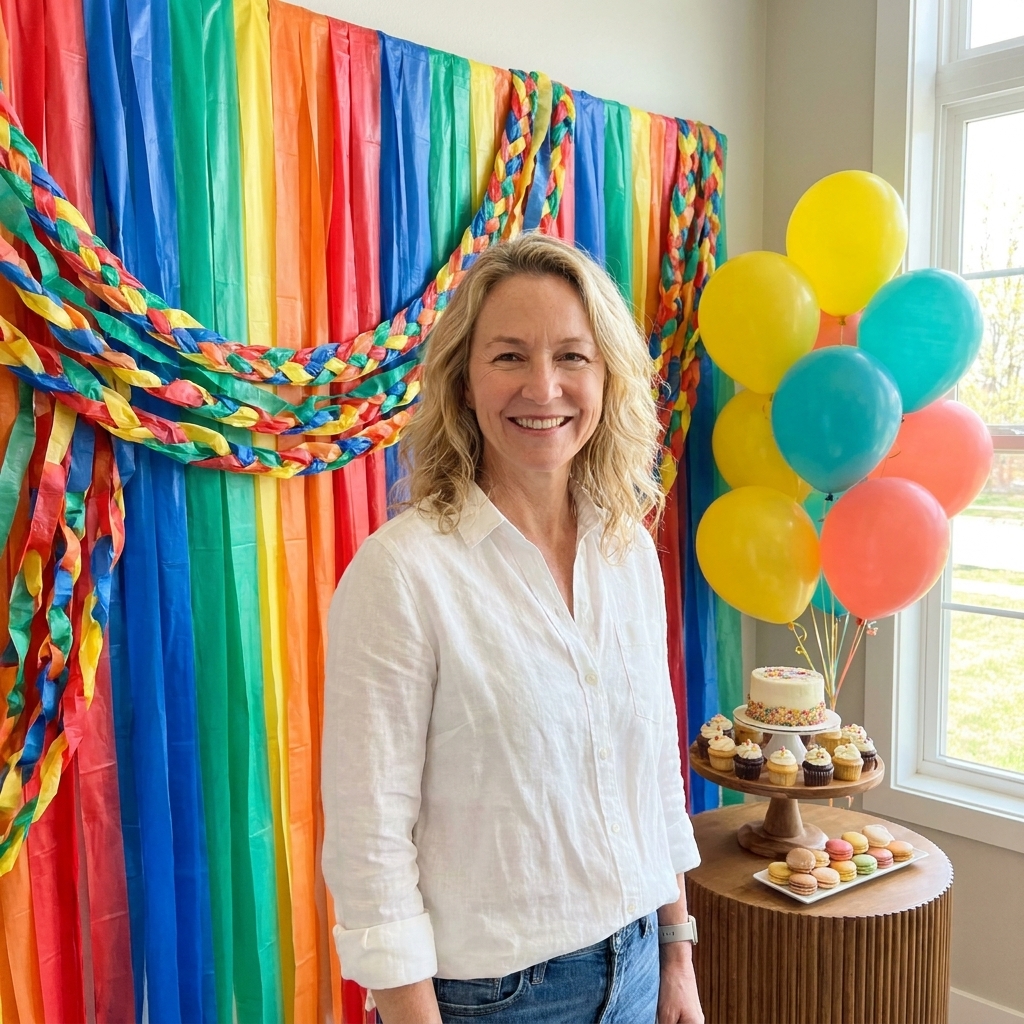
The first “wow” backdrop I ever made was for a backyard birthday that outgrew my dining room. I had big dreams, a small budget, and exactly one day to pull it off. Enter: those crinkly plastic tablecloths from the dollar store. With a little braiding, layering, and a hot glue gun that worked overtime, we ended up with a photo wall that looked way more expensive than it had any right to.
This is my go-to method when you want a thick, textured backdrop (not a flimsy sheet) without buying specialty panels. I will walk you through two reliable builds: a braided “rope” backdrop and a layered ruffle backdrop, plus hanging tips that keep the whole thing smooth in photos.
What you can make
Plastic tablecloths are basically party wallpaper. When you cut them into strips and build them up in layers, they stop reading as “plastic” and start reading as texture. This technique works especially well for:
- Birthday photo walls behind a cake or gift table
- Baby showers (soft ruffles look like giant tissue fringe)
- Graduation backdrops (school colors, ombre, or stripes)
- DIY step-and-repeat vibes for a big group photo moment
If you are already planning other DIY decor, you can pair this with a simple balloon garland or a few big paper fans and it looks instantly “styled.” More budget-friendly ideas live over on Budget Party Hacks.
Time and help
- Ruffle backdrop (about 6 ft. × 7 ft.): roughly 1 to 2 hours solo, faster with a helper cutting strips while you attach.
- Braided backdrop (about 6 ft. × 7 ft.): roughly 3 to 5 hours, and it is genuinely easier with two people.
My honest rule: if you only have one evening, choose ruffles. If you have a weekend afternoon and a friend who likes to keep their hands busy, braid it.
Supplies (budget and not fussy)
- Plastic tablecloths (rectangular, disposable party kind). Most are around 54 in. × 108 in., but sizes vary a lot, so check the package.
- Sharp scissors (a rotary cutter is nice but not necessary)
- Painter’s tape and measuring tape
- Hot glue gun and extra sticks (or strong double-sided tape for low-heat setups)
- Base or panel options: foam board sheets taped together, a tri-fold display board, or a large piece of cardboard
- Hanging options: curtain rod, clothing rack, or a sturdy line or rope you can clip to
- Clips (binder clips, clothespins, or shower curtain rings)
- Optional: clear packing tape (for reinforcement), command-style hanging strips (for very light panels)
Quick safety note: Keep hot glue away from kids, and never use open flame or high heat near plastic. If plastic melts, it can release unpleasant fumes, so ventilate the space and step away until it cools.
Pick size and colors
Sizes that photograph well
For most parties, these are my sweet spots:
- Solo portraits: 4 ft. × 6 ft.
- Couples or two kids: 5 ft. × 6 to 7 ft.
- Small groups: 6 to 8 ft. × 7 ft.
Go taller than you think you need. Cameras love catching the top edge when people lift their arms or someone tall hops in the back row.
Color plan before you cut
Tablecloths come in loud, shiny colors, which is great if you use them intentionally:
- Ombre: dark at the bottom, light at the top (very forgiving in photos)
- Two-tone: alternating colors in rows or vertical columns
- Neutral base + accent: white or black with one bright color woven through
My favorite “expensive” trick is to mix two close shades of the same color (like blush + dusty rose). The variation hides seams and makes the texture read thicker.
Material tip
Not all tablecloths behave the same. The thin, crinkly kind (often PE plastic) is easiest to cut and ruffle, but it can tear if you pull too hard. Thicker vinyl tablecloths are heavier and can be harder to braid, and they need stronger clips and more support. If you are not sure, buy one tablecloth first and do a mini test braid or a test ruffle row before you commit.
Method 1: Braided backdrop
This one is the showstopper. Braids create depth, and depth is what makes plastic stop looking flat.
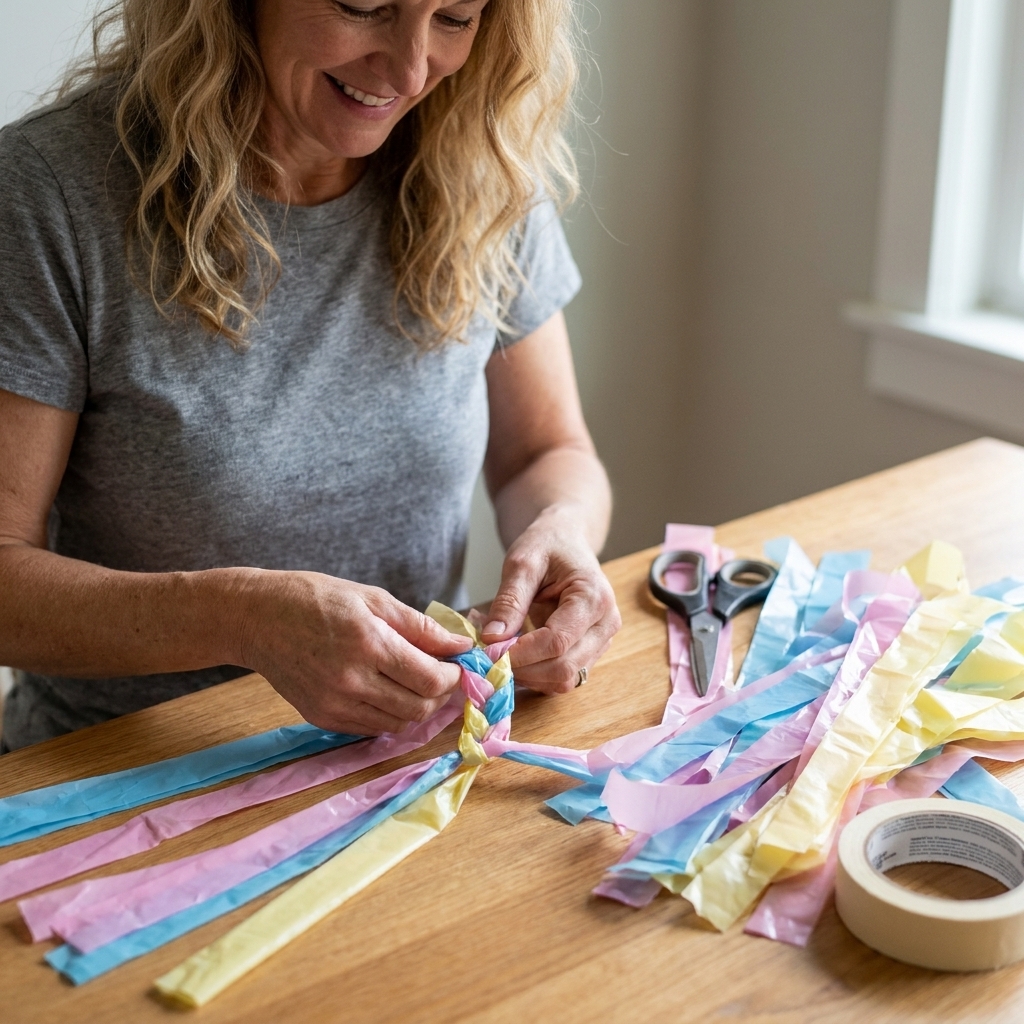
Step 1: Cut long strips
Unfold one tablecloth and smooth it out. Cut it into long strips that are:
- 2 to 3 inches wide for chunkier braids
- 1.5 to 2 inches wide for tighter, more detailed texture
Do not stress about perfect measurements. Slight variation actually adds softness visually.
Step 2: Make extra-long strands
To braid continuously, you need long lengths. Two easy ways:
- Knot method (fast and strong): Tie strip ends together with a simple overhand knot. Keep the tails short, and rotate knots so they land on the back side when you attach the braid.
- Tape method (flatter look): Overlap ends by about 2 inches and secure both sides with clear packing tape.
Make three long strands for each braid.
Step 3: Braid, then puff
Braid like you would hair. When you finish a section, gently tug outward on the braid loops to widen it. That puffing step is what makes it look plush instead of tight and stringy.
Step 4: Attach braids to a base
You have two solid mounting options:
- On a panel (best for clean edges): Lay a foam board or cardboard panel flat. Hot glue the braids in horizontal rows, touching edge to edge. Start at the bottom and work up.
- On a line (best if you need it lightweight): Stretch a sturdy string or thin rope between two supports. Clip braid tops with binder clips or clothespins every 4 to 6 inches, then hide clips with a small piece of extra plastic wrapped over them.
Pro tip: If you are gluing, glue in short bursts. Thin tablecloth plastic can warp if it gets too hot in one spot.
Step 5: Finish the top edge
Top edges love to look “crafty” if you leave them raw. Two quick fixes:
- Fold-over band: Cut a 3 to 4 inch strip, fold it over the top like binding, and glue.
- Final braid: Run one braid across the very top horizontally to cap the look.
Method 2: Ruffle backdrop
If you want something quicker than braiding, ruffles are your best friend. The density comes from overlap, not precision.
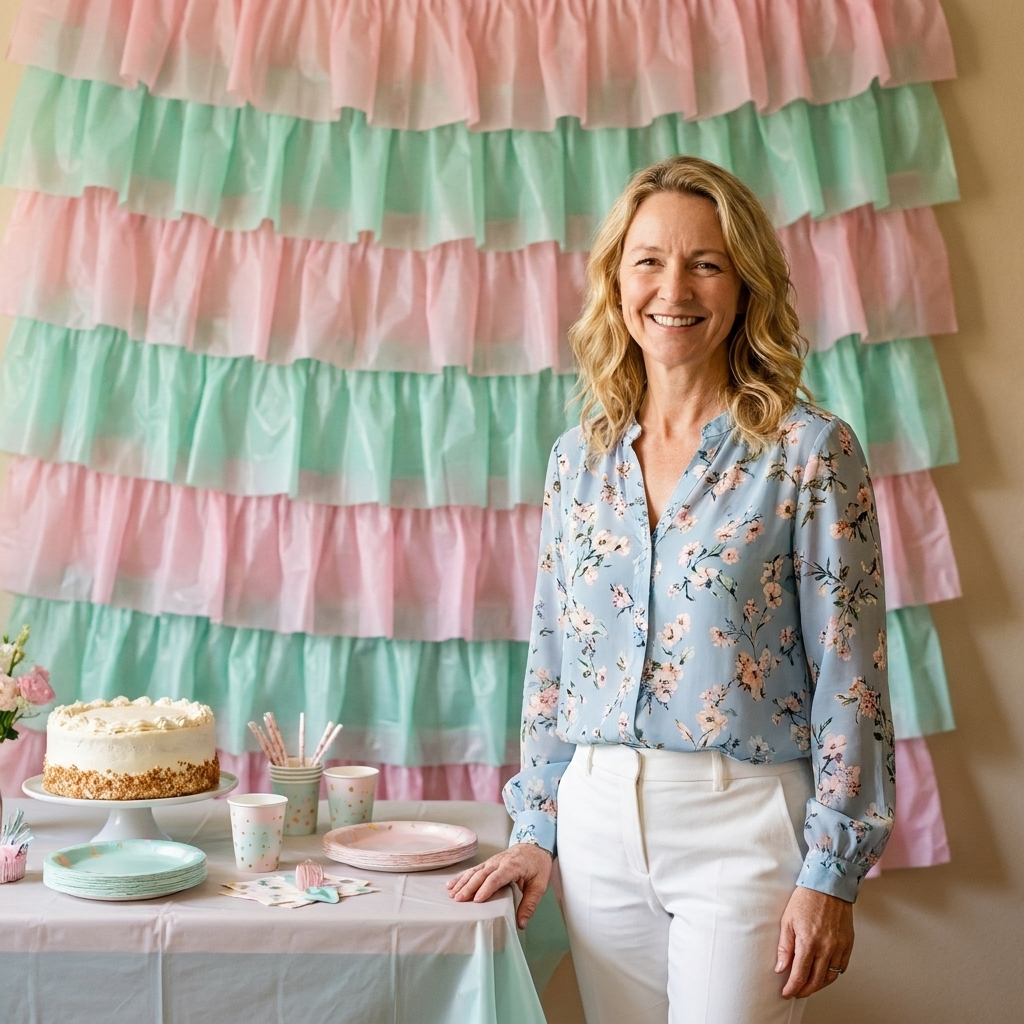
Step 1: Make ruffle strips
Cut strips that are 4 to 6 inches wide. Wider strips read more like fabric ruffles.
Step 2: Create ruffles without sewing
Pick one:
- Accordion fold: Fold the strip back and forth every 2 to 3 inches. To keep plastic from tearing, add a strip of packing tape along the top edge first, then staple through the taped edge. You can also staple or tape the folded strip onto a paper or cardstock “header band,” then attach the band to your base.
- Gather-and-glue: Run a thin line of glue along the top edge and quickly scrunch the strip as you go. Work in 12 inch sections so the glue does not set before you gather.
Step 3: Layer bottom to top
Attach ruffles in rows, overlapping each row by 1 to 2 inches. Bottom-to-top layering hides the attachment points and adds that “thick wall” look.
Step 4: Add a second texture layer
To avoid a costume-y look, add contrast texture:
- Weave in a few thin 1 inch strips curled slightly
- Add occasional braided accents across every third row
- Mix two finishes like matte-looking white with a slightly shinier accent color
My favorite combo
If you want maximum “expensive” with minimal effort, do this:
- Make 3 to 5 chunky braids for bold structure
- Fill between them with ruffle rows
- Keep the braids evenly spaced so the wall looks intentional
This combo photographs beautifully because braids add shadow and the ruffles soften everything.
Hang it clean
Option A: Tape to a wall
Painter’s tape works for very light backdrops, especially the ruffle type. To avoid paint drama:
- Test painter’s tape on an inconspicuous spot first, since some paints and wallpapers still lift.
- Put painter’s tape on the wall first.
- Then tape your backdrop to the painter’s tape.
- Use more points than you think you need, especially along the top edge.
Option B: Freestanding setup
If you have a curtain rod, clothing rack, or a couple of tall stands, you can clip the finished backdrop panel or the top band to it. The key is tension:
- Clip every 4 to 6 inches.
- Add one clip at each outer corner pulling slightly outward.
- If the center sags, add a hidden clip in the middle.
Option C: Panel method
I love panel backdrops for parties at someone else’s house. You can build on:
- Tri-fold display boards
- Multiple foam boards taped together on the back
- Large flattened cardboard boxes (reinforced with tape)
Lean the panel against a wall and secure it with painter’s tape at the top corners so it cannot slide forward.
Fix common issues
It looks too shiny in flash photos
- Avoid direct flash if you can. Ask guests to stand a step forward and angle lights away from the wall.
- Use ruffles or braids instead of flat sheets. Texture breaks up glare.
- Metallics and very dark, glossy colors tend to show specular glare the most, but really any shiny finish can flare under flash. Test on your phone before guests arrive.
My backdrop is drooping
- Add more clips or tape points along the top.
- Run a strip of cardboard or a wooden dowel across the top back as a spine.
- If it is panel-based, reinforce seams on the back with packing tape.
I can see gaps
- Step back and look from the camera angle. Gaps are often only visible up close.
- Add a second layer in the gap zones, especially at shoulder height where photos focus.
- Use a darker color behind if your wall is bright and showing through.
The knots look messy
- Hide knots on the back if you are panel-gluing.
- For line-hung backdrops, place knots near the top where ruffles, balloons, or a top braid can disguise them.
How many tablecloths
It depends on density and tablecloth size. The estimates below assume standard disposable tablecloths around 54 in. × 108 in., plus typical overlap. Your count will change if you cut thinner strips, braid extra chunky, or use a larger tablecloth size.
If you want a number that is actually true for your build, do this first: make one test braid or one full ruffle row, measure how much width it covers, then extrapolate across your planned backdrop width.
| Backdrop size | Braided method | Ruffle method |
|---|---|---|
| 4 ft. × 6 ft. | 6 to 10 tablecloths | 5 to 8 tablecloths |
| 6 ft. × 7 ft. | 10 to 16 tablecloths | 8 to 13 tablecloths |
| 8 ft. × 7 ft. | 14 to 20 tablecloths | 12 to 18 tablecloths |
If you are on the fence, buy two extra. Nothing derails the vibe like realizing you are one tablecloth short when the glue gun is already hot.
Style it like a pro
- Create a focal zone: Add denser texture in the middle third where faces will be.
- Keep the floor clean: A simple rug or a sweep of solid fabric underfoot makes the backdrop look intentional.
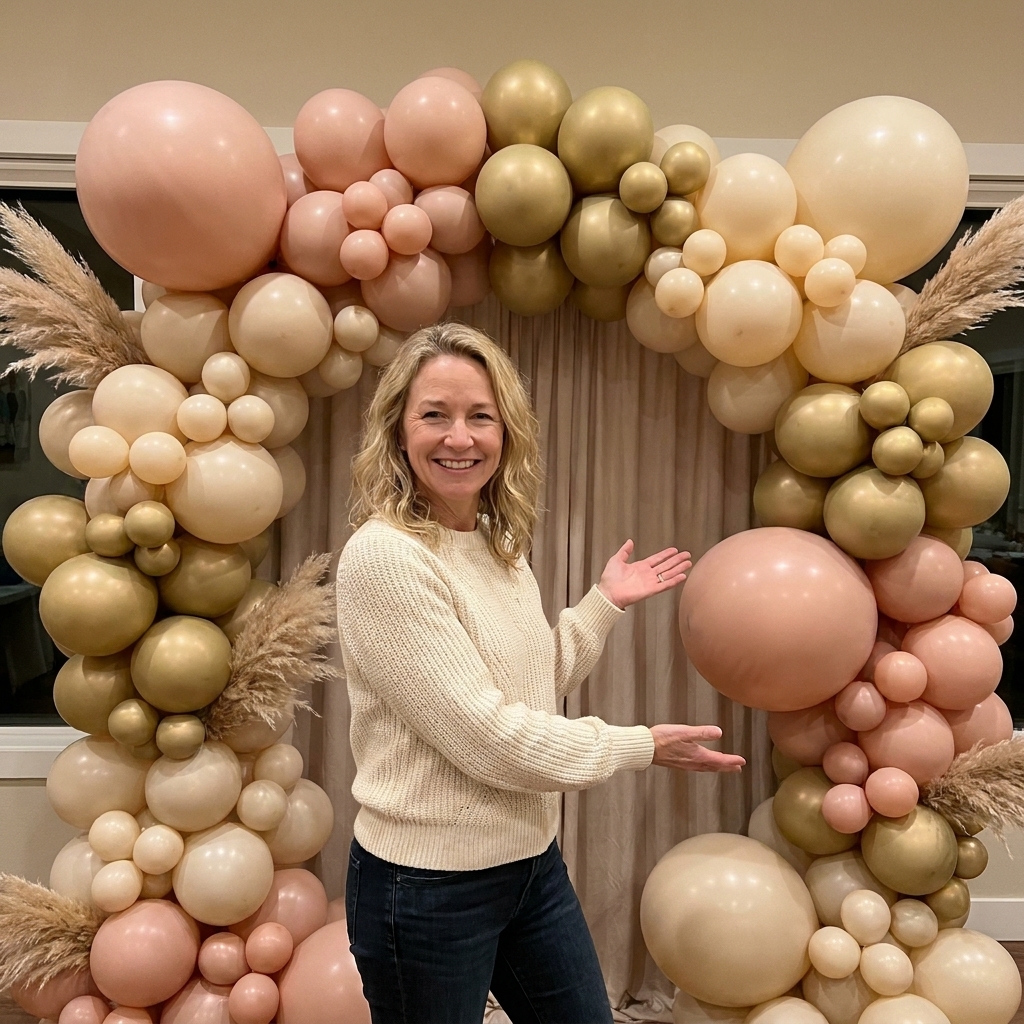
- Add one anchor element: A balloon garland, a big number balloon, or a small cluster of faux greenery gives the eye a place to land.
- Check it on camera early: Take a quick phone photo from 6 to 8 feet back. Fix gaps and glare before guests arrive.
If you want more DIY build ideas that pair well with this, you can browse DIY Decor Projects for other easy upgrades.
Cleanup and reuse
Plastic backdrops can absolutely be reused if you treat them gently.
- Panel backdrops: Store flat behind a couch or under a bed. If you must stack, put a sheet or paper between layers so the glue bits do not snag.
- Line-hung backdrops: Roll, do not fold. Folding creates hard creases that catch light in photos.
- Spot repairs: Patch small tears from behind with clear packing tape. Then cover the front with a small ruffle or braid scrap if needed.
Quick FAQ
Can I use a stapler instead of hot glue
Yes, if you are attaching to cardboard or foam board. For plastic strips, staple through a reinforced top edge (packing tape works), or staple the plastic onto a paper or cardstock header band first to help prevent tearing.
Will this work outdoors
It can, but wind is the enemy. Use a panel if possible, and weigh down the bottom edge behind the backdrop (a taped-on strip of cardboard helps). Also avoid direct sun and high heat if you can, because heat can soften glue and tape and make glare worse.
Is it safe to steam plastic tablecloths
I avoid it. If you must reduce wrinkles, hang it up for a day and let gravity help. Gentle pulling while attaching also smooths a lot.
One last Joanna tip
If your backdrop looks a little too perfect while you are building it, you are doing great. The magic happens once people step in front of it. Texture + color + happy faces equals a “how did you make that?” moment every time.
If you try the braid method, I would love to see your color combo. You can always reach me through the contact page.