
Build elegant floating candle centerpieces with submerged florals that won’t pop up. Get the weighted-base method, clear-water hacks, sizing tips, and fixes ...
Gathova
DIY Winter Wonderland Decor: Realistic Fake Snow and Icy Displays

Joanna Mercer
Joanna Mercer is an enthusiastic DIY event decorator and the creative spirit behind Gathova's party guides. With years of hands-on experience designing stunning tablescapes, balloon garlands, and custom photo backdrops for friends and family, she specializes in accessible, budget-friendly celebrations. Joanna loves sharing her practical tips and crafting tutorials to help anyone turn an ordinary space into a memorable party venue.
Published
The first winter wonderland I ever styled was for a friend’s December birthday in my tiny living room, with exactly one goal: make it feel like we stepped into fresh snow without turning the carpet into a soggy disaster. If you have ever sprinkled the wrong “snow” and watched it melt, clump, or shed glitter for the next three months, I’ve been there.
This guide is my practical, party-tested way to get realistic fake snow, frosted branches, and icy displays that look crisp in person and in photos, without wrecking your venue.

Pick your snow vibe first
Before you buy anything, decide what kind of “snow” you are trying to mimic. Real snow is not one texture, so your decor should not be either.
- Fresh fallen powder: soft, fluffy, matte. Best for tabletops, mantel styling, and around props.
- Crusted sparkle snow: slightly reflective, crunchy-looking. Great on branches, wreaths, and edges of displays.
- Ice and frost: translucent, glassy, hard-looking. Perfect for centerpieces, bar setups, entry tables, and photo backdrops.
My favorite winter wonderland rooms use all three textures in small doses. The mix is what makes it feel believable.
Realistic fake snow options
Not all artificial snow is created equal. Here is the quick cheat sheet I wish someone handed me years ago.
1) Polyfill stuffing (my go-to for fast, fluffy)
This is the same stuffing used for pillows and plush toys. It photographs like powdery drifts if you tease it out thinly.
- Looks like: fresh, fluffy snow
- Best for: table runners, shelf styling, under villages or figurines, around centerpiece bases
- Avoid: high-traffic floor areas (it clings to shoes and socks)
Joanna tip: Pull it apart into wispy layers, then overlap like clouds. If you keep it in thick clumps, it can read like pillow guts.
2) Snow blanket fabric (best for clean edges and quick teardown)
Craft stores sell snow blanket rolls that are basically fluffy batting. It is less flyaway than loose polyfill.
- Looks like: even snow cover
- Best for: long buffet runs, stair ledges, photo booth tables
- Bonus: rolls up and stores easily for next year
3) “Instant snow” powder (best for contained decor)
This is the expanding kind that activates with water. Most versions turn into a moisture-holding gel rather than a puddle, but it can still transfer dampness, leave residue, or cause dye bleed if it touches porous surfaces.
- Looks like: granular snow in cups, lanterns, vases
- Best for: sealed or contained decor (clear ornaments, apothecary jars)
- Protect surfaces: set containers on a tray, acrylic coaster, or small plate so any condensation or stray bits do not touch wood or linens
- Avoid: direct contact with wood furniture, linens, paper goods
4) Epsom salt sparkle (best for icy crust on props)
Epsom salt gives a believable crystalline look when used as a coating, not as a sprinkle-everywhere solution.
- Looks like: crunchy sparkle snow or frost crystals
- Best for: glass jar rims, faux pinecones, faux greenery edges, display borders
- Watch for: shedding on dark fabrics
- Humidity note: in damp spaces or near condensation, it can soften or dissolve and leave a salty film, so keep it off valuable finishes and away from drink stations
5) Fake snow spray (best for frosted windows and branches)
Snow spray is amazing when you want that “just walked outside” frosty haze on branches, wreaths, and glass. It is also the easiest way to accidentally make a mess, so go slow.
- Looks like: powdery frost
- Best for: branches, wreaths, pine garlands, window corners
- Must do: test spray first and protect surfaces
If you are building a full-room moment and want a clean, controlled setup, I like pairing snow blanket fabric (base layer) with teased polyfill (drifts) and a light frost treatment on focal branches.
Make fake snow look real
- Keep it matte first, sparkle second. Real snow is mostly matte until light hits it at an angle. Too much glitter screams craft project.
- Create drifts, not a flat sheet. Build higher spots near decor bases and let it thin out toward the edges.
- Hide mechanics. Cords, tape, floral foam, and stand bases should disappear under “snow.”
- Repeat textures. If your table has fluffy snow, add a small frosty element nearby (branch tips, jar rim, acrylic “ice”).
- Use negative space. Leave small areas “cleared,” especially on serving tables. It looks more intentional and keeps food safe.
- Photo-test early. Take one quick photo from guest eye level. If it looks like cotton balls, pull it thinner and widen the coverage.
DIY frosted branches
Frosted branches are the backbone of an icy display because they add height and instantly say “winter.” You can buy them pre-flocked, but DIY is totally doable if you work in thin layers and seal smartly.
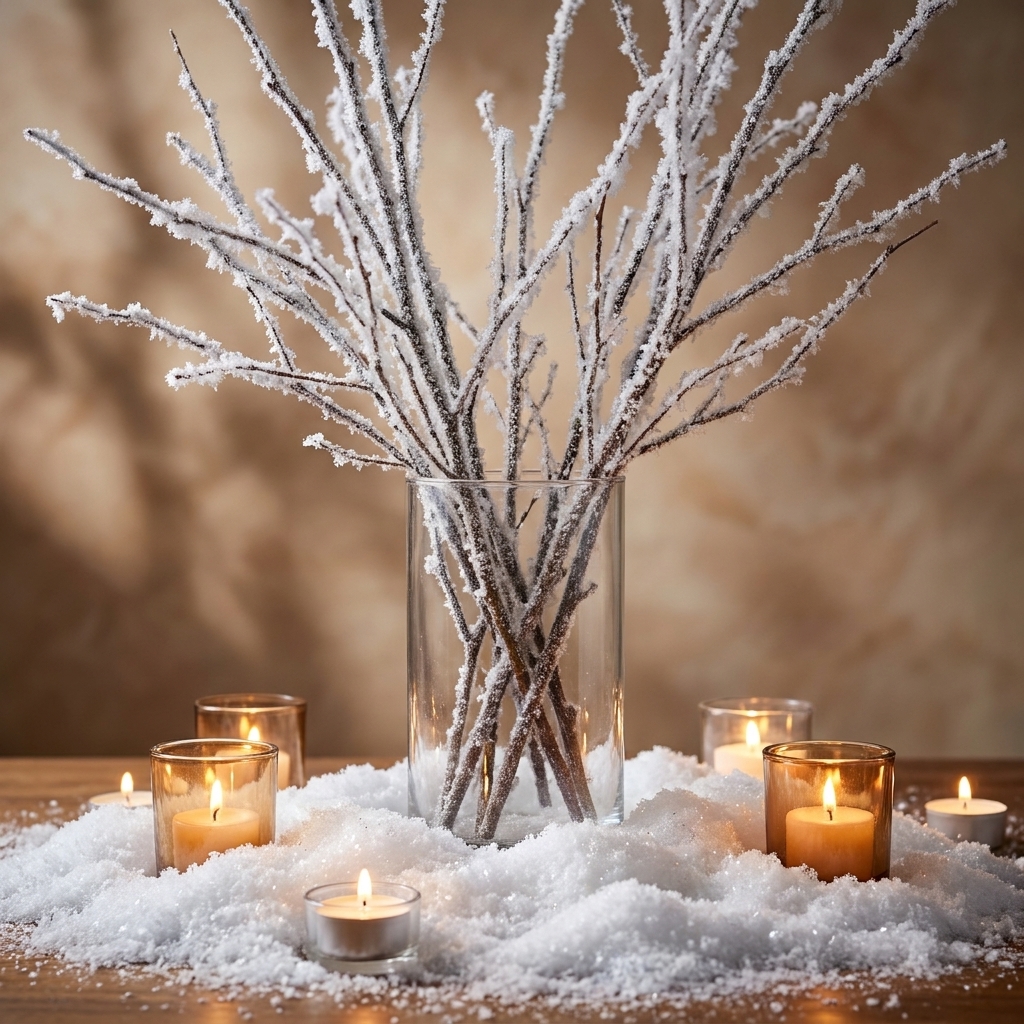
Option A: Light frost (quick and realistic)
- Faux branches or twigs (or real branches fully dried)
- White matte spray paint or snow spray
- Clear matte sealer spray (optional but helpful)
- Drop cloth and gloves
- Prep the area. Work outdoors or in a garage with a drop cloth.
- Test first. Spray one scrap branch (or the back side) and let it dry. Some sprays and sealers can go glossy, gum up texture, or yellow over time.
- Do a light pass. Spray from 12 to 18 inches away. You want uneven coverage like natural frost.
- Let it dry fully. Rotate and repeat on the back side only if needed.
- Seal lightly. If you choose to seal, do one very light coat of clear matte sealer and stop. Heavy sealer can make “frost” look wet.
Joanna tip: Frost should look heavier at the tips and top edges, lighter toward the base. That little gradient is what makes people assume it is store-bought.
Option B: Crystal branch (sparkle without glitter)
If you want that icy-crunch look, use a thin but tacky layer and a crystalline coating.
- Branches
- Decoupage medium or white glue thinned slightly with water (think paint-like, not watery)
- Epsom salt
- Disposable plate or tray
- Brush on a thin coat of decoupage medium or thinned glue where you want frost. It should feel tacky, not drippy.
- Sprinkle Epsom salt over the wet areas, then gently tap off excess.
- Dry completely before moving. This method looks best when it is not handled a lot.
Where I use this: on small accent branches in arrangements, not on anything guests will touch all night.
Build icy displays
When people say “icy,” they usually mean translucent shine plus sharp edges. You can get that vibe without real ice and without puddles.
My favorite ice stand-ins
- Acrylic risers and trays: clean, glassy, and reusable
- Clear ornaments: fill with faux snow, tiny bottlebrush trees, or fairy lights
- Glass cylinders: for candles, submerged florals, or branch arrangements
- Cellophane or clear wrap: crumple into “ice shards” inside vases (kept away from flames)
- Mirror bases: bounce light and instantly make centerpieces feel more wintry
If you want candlelight in your winter scene, I like pairing icy elements with the soft glow of floating candles. (If you want the full how-to, my centerpiece method is over on Floating Candle Centerpieces With Submerged Florals.)
And if you want maximum sparkle with minimal spending, mirrors are your best friend. I use them constantly to brighten darker rooms. More ideas here: Mirror Bases for Brighter Centerpieces.
Blue lighting that flatters
Blue light is the shortcut to “winter,” but harsh blue can make guests look a little like they are auditioning for a ghost story. The trick is layering, and keeping saturated blue off faces.
My easy lighting formula
- Base layer: cool blue uplights aimed at walls, corners, and behind decor (not directly at people)
- Fill layer: warm white string lights or candles for warmth and skin tone balance
- Accent layer: a few pinpoint fairy lights inside jars, vases, or along branches
Placement that looks expensive
- Aim uplights up, not out. Place lights on the floor and point them toward the ceiling to wash walls.
- Hide the fixture. Tuck uplights behind a faux tree, a column, or a side table skirt.
- Keep warm light near people. For photos, have a warm source at table height (candles in hurricanes or warm string lights) so faces do not go blue.
- Create ice glow. Put a small light behind clear acrylic or glass so it refracts.
Joanna tip: If you are choosing bulb temperatures, look for cool white for the winter layer and warm white for candles and twinkle lights. Mixing both is what makes the room feel magical instead of clinical.
Winter tablescape build order
If you are styling a table, the order you layer things matters. This is how I set up so it looks cohesive, not cluttered.

- Start with your runner. A white or icy-gray base keeps everything clean.
- Add height first. Branches in vases or a few tall pieces so you are not trying to fit them later.
- Place candle cylinders. Space them evenly. Then stop touching them.
- Lay snow last. Tuck it around bases to hide mechanics and soften hard edges.
- Add ice accents. Clear ornaments, acrylic pieces, or a mirror base under the centerpiece.
- Finish with one small sparkle element. Think frosted pinecones or a touch of crystal picks, not a glitter storm.
If you want more help balancing centerpiece height with guest conversation, I have a full breakdown here: Tall vs Low Centerpieces.
Safety and venue rules
- Keep anything fluffy away from open flames. If you are using polyfill or snow blanket near candles, use LED candles or put real flames inside tall hurricane glass.
- Ventilate when using sprays. Snow spray and sealers should be used outdoors or in a well-ventilated space, fully dry before bringing indoors. Test first.
- Skip loose snow on food tables. Use contained snow in jars or behind the display line, and keep serving areas clean.
- Check venue policies. Some venues treat flocking, loose “snow,” and glitter-like materials as a cleanup risk. When in doubt, choose snow blanket fabric and contained displays.
- Kids and pets: polyfill fibers and instant snow gel are not taste-test friendly. If little hands or paws will be involved, keep loose snow out of reach and stick to contained decor.
- Consider sensitivities. Strong aerosols and heavily scented candles can bother guests. When in doubt, go unscented and low-odor.
Troubleshooting
My snow looks yellow under lights
Warm bulbs can turn “white” snow creamy fast. Add a cool lighting source nearby (blue uplight bounced off a wall) or switch twinkle lights to cool white. A mirror base can also counteract the yellow cast by bouncing cleaner light upward.
It looks like cotton balls
Pull your polyfill thinner and wider, then overlap in layers. Add one firmer snow element (snow blanket fabric underneath) so the fluff reads like texture, not stuffing.
It is shedding all over the floor
Use fewer loose fibers and anchor snow in place around centerpiece bases. On floors, stick to snow blanket fabric in controlled strips instead of teased polyfill.
My frosted branches are flaking
That usually means the layer is too thick or not fully cured. Next time, spray in lighter passes and test your sealer on a scrap branch before committing. For this event, position flakier branches behind the arrangement where guests will not brush them.
Cleanup and storage
The secret to loving winter wonderland decor is making teardown painless.
- Polyfill cleanup: a lint roller grabs stray fibers fast. For bigger areas, stretch a thin sock or nylon over your vacuum hose with a rubber band, then vacuum. You catch the fluff on the sock instead of clogging the machine.
- Snow blanket storage: roll it back up, slip it into a trash bag or large tote, and label it. It will look nicer next year if it is not crushed under heavy bins.
- Frosted branches: store upright in a tall bin if possible, or wrap loosely in kraft paper so the coating does not rub off. If they shed, they need less handling, not more shaking.
- Instant snow: dispose of it in the trash, not down a drain. Wipe jars dry before storing to avoid cloudy residue.
Budget-friendly swaps
- Use thrifted glass vases and make the branches your star. For more flipping ideas, see Thrift Store Decor Flips.
- Choose one hero focal point (entry table, dessert table, or fireplace) and keep other areas simple but consistent with lighting.
- Repeat two colors (white and icy blue) and one metallic (silver or champagne gold). Limiting the palette is what looks high-end.
Winter mini checklist
- Base layer: runner or snow blanket fabric
- Fluffy layer: teased polyfill drifts (contained, not everywhere)
- Frost element: DIY frosted branches or a lightly flocked garland
- Ice element: clear acrylic, glass cylinders, or mirror bases
- Lighting: blue uplight on walls plus warm twinkle or candle fill
- Final edit: remove one thing before guests arrive (seriously, it helps)
If you build your winter decor in layers and treat fake snow like a styling material, not confetti, you will get that crisp, realistic look that makes people stop and take photos the second they walk in.