A practical, party-night-safe guide to hanging outdoor fairy lights on patios, trees, or poles—plus load checks, cord routing, GFCI tips, and wind/moisture f...
Gathova
Hang Heavy Christmas Garlands on Staircases Without Damaging Banisters

Joanna Mercer
Joanna Mercer is an enthusiastic DIY event decorator and the creative spirit behind Gathova's party guides. With years of hands-on experience designing stunning tablescapes, balloon garlands, and custom photo backdrops for friends and family, she specializes in accessible, budget-friendly celebrations. Joanna loves sharing her practical tips and crafting tutorials to help anyone turn an ordinary space into a memorable party venue.
Published · Last updated
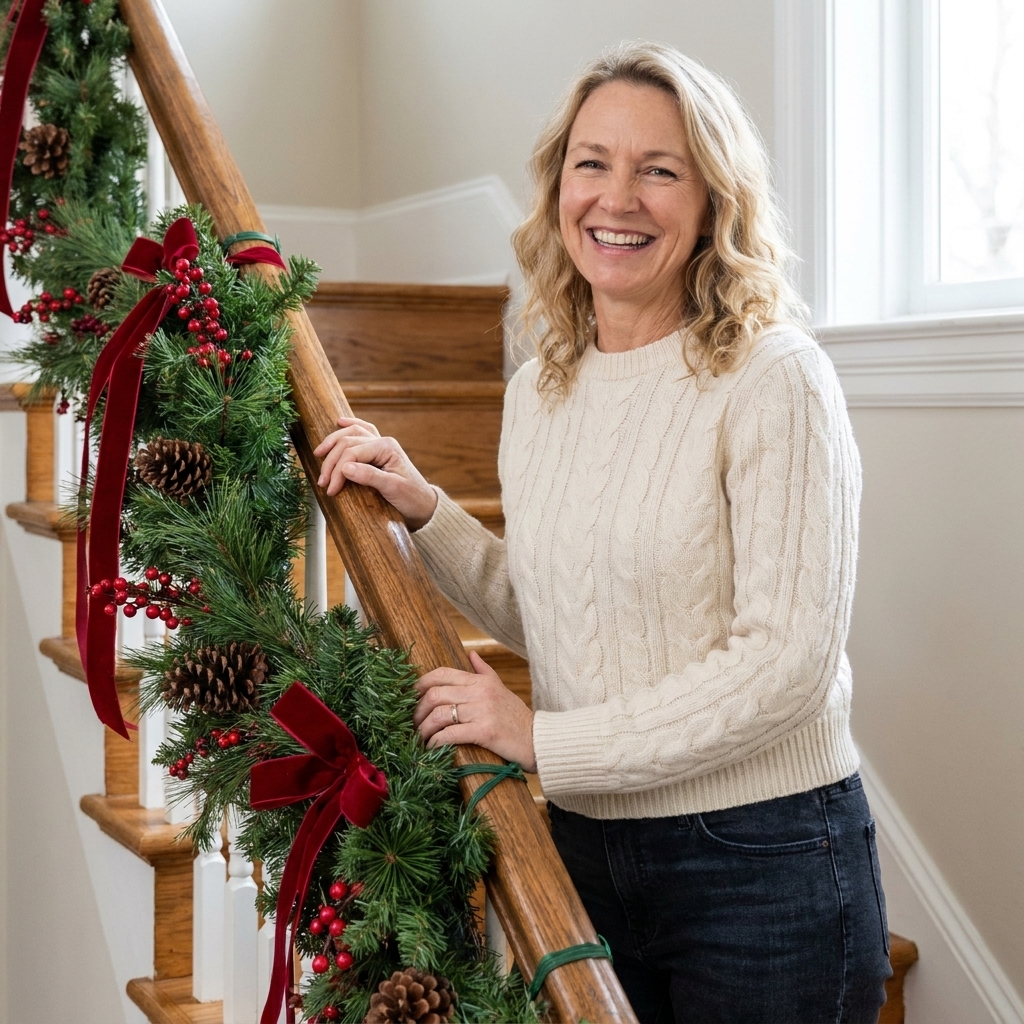
The year I first upgraded from wispy pine to a thick, pre-lit Christmas garland on my staircase, I learned two things fast: heavy greenery loves to slide, and banisters love to show every tiny scuff. If your garland has built-in lights, wired stems, pinecones, or ornaments, it can get surprisingly weighty. The goal is a lush look that stays put through guests, kids, and pets, without tape residue or scratched wood.
Choose a damage-free method
There is no single best way because staircases vary. I pick my method based on two things: how heavy the garland is and what the banister finish is (painted, stained wood, metal, or a chunky square rail). If your finish is older, softer, or freshly refinished, do a quick test in an inconspicuous spot and tighten everything only to snug.
Best options for heavy garlands
- Releasable zip ties plus padding (my go-to for thick, weighted garlands). They grip hard and usually remove cleanly when you do not over-tighten.
- Decorating wire plus padding for a super tailored look, especially on iron spindles.
- Removable outdoor-rated hooks on the wall side (not on the wood rail) to take some weight off the banister.
What I avoid on finished banisters
- Staples, nails, or brad nails into the rail.
- Hot glue directly on wood (it can lift or mark some finishes).
- Standard clear tape or packing tape (residue city).
- All the weight supported by one or two points, which makes sliding and sagging more likely.
Supplies that prevent scuffs
Most “damage” happens from friction. The garland shifts, the tie bites into the finish, or the wire rubs. A tiny buffer layer makes a huge difference, especially on glossy paint or soft, older stain.
My simple supply list
- Releasable zip ties (also called reusable, re-openable, or releasable cable ties)
- Padding material: felt pads, scrap felt, a strip of flannel, or microfiber cloth cut into small rectangles
- Green floral wire (optional, for shaping and fine-tuning)
- Wire cutters or scissors
- Step stool that feels stable on the landing
- Painter’s tape (only for temporary positioning, not for long-term support)
Cut your felt or fabric into small pieces, just big enough to sit under the tie and disappear under the greenery. You want protection, not a visible patchwork.
If your garland is pre-lit, add: extension cord, cord clips for the wall side, and a timer plug so you are not yanking cords daily. I also stick to lights, cords, and power strips that are UL- or ETL-listed, and I skip anything with cracked insulation or loose connections.
Zip ties and felt, step by step
This is the method I use when the garland has lights, pinecones, or ornament picks and I want it to survive a whole season.
- Clean the rail quickly. Wipe dust off the top and sides so nothing grinds into the finish when you tighten ties.
- Dry-fit your drape. Lay the garland along the rail to plan where the swags will fall. I aim for even “smiles,” not one long droopy section.
- Decide your tie spacing. For a heavy garland, place a tie about every 12 to 18 inches. If it is extremely heavy or you have a steep staircase, go closer to 10 to 12 inches.
- Add padding at each tie point. Place a small felt or microfiber rectangle between the tie and the banister where the tie will wrap. This is your scratch insurance.
- Loop the zip tie around the banister and garland stem. Catch the inner wire spine of the garland, not just fluffy tips. Tighten until snug, not crushing. If your rail finish dents easily, stop sooner than you think and add another tie instead of tightening harder.
- Hide the closure. Rotate the zip tie clasp to the underside of the rail or tuck it into the greenery.
- Shape after securing. Once all ties are in, fluff and shape the garland. It is easier to perfect the look when it is not sliding around.
- Trim the tail cleanly. Snip zip tie tails flush so no sharp edges scratch hands while using the stairs.
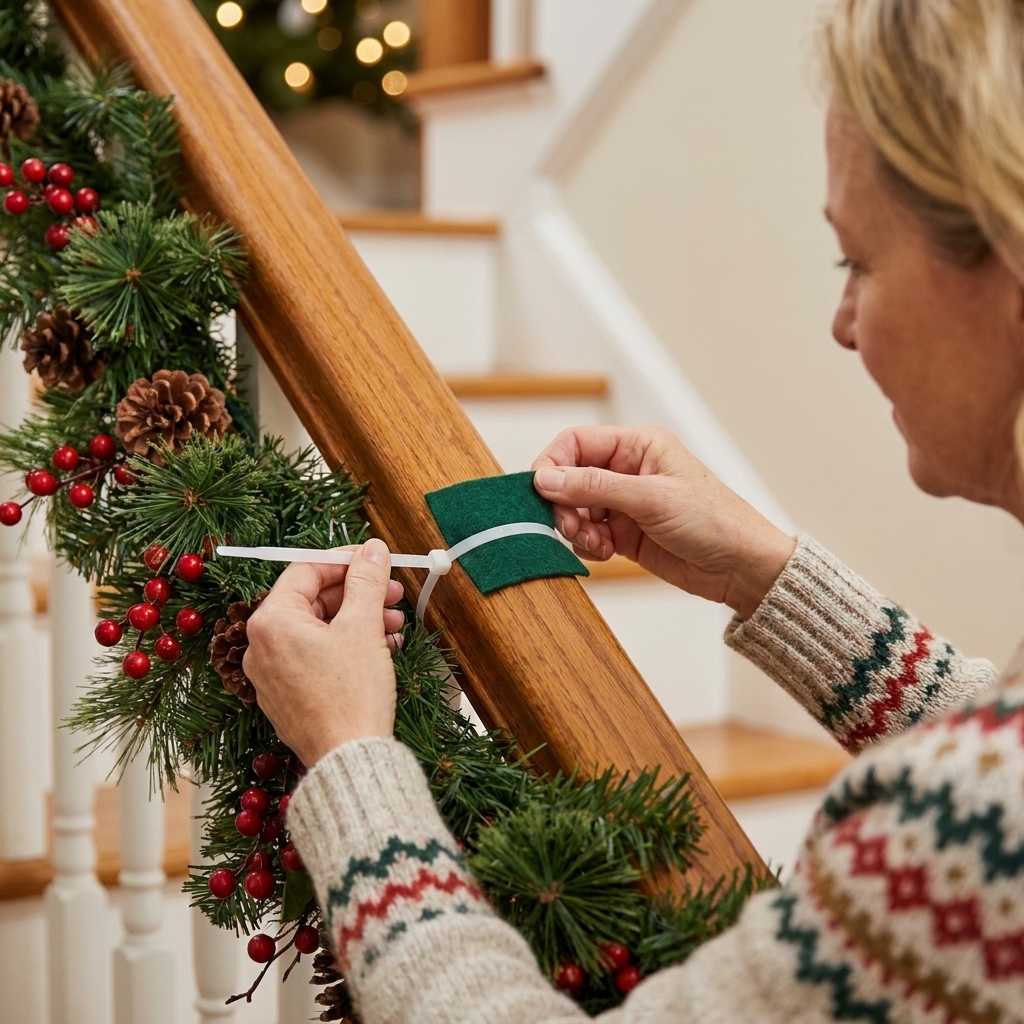
Joanna tip: On glossy painted rails, I double up the buffer layer (felt plus a thin strip of microfiber). Those finishes can show pressure marks more easily, even when nothing technically “scratches.”
Wire ties for iron spindles
If your staircase has metal spindles, you can anchor the garland to the spindles instead of cinching around the wood top rail. This spreads the load and often looks cleaner.
- Cut wire lengths about 8 to 10 inches each.
- Add padding if the wire will touch painted wood anywhere.
- Wrap wire around the garland’s main stem and the spindle, then twist tight.
- Tuck sharp ends inward and down into the greenery so no one gets snagged.
This method is also great for staircases where the top rail is wide and square, and wrapping a tie around it would look bulky.
Wall hooks to stop sliding
If your staircase runs along a wall, you can take some weight off the banister by supporting garland swags from the wall side. Done right, this reduces pull and prevents that slow seasonal “creep” down the stairs.
- Use removable hooks on the painted wall, not on stained wood. Place them above or beside the rail so greenery covers them.
- Hang the garland’s inner stem on the hook, then secure the garland to the banister with fewer ties.
- Keep tension gentle. Hooks should support, not stretch the garland tight like a bowstring.
If you are unsure which hooks are safe for your wall paint, follow the manufacturer’s prep and removal instructions and test one behind a frame first. Also note that fresh paint needs time to cure before most adhesives behave well, often a couple of weeks.
Rail shape matters
A quick callout that saves a lot of frustration: the shape of your banister affects how well anything “grabs.”
- Round rails: ties can roll if you only anchor at a few spots. Use closer spacing and consider anchoring to spindles, or use two tie points near each swag “high point” to reduce rotation.
- Square or wide rails: sliding is less about rolling and more about weight. More anchor points and wall-side support hooks help most.
Real garland notes
If you are using real cedar, pine, or fir garland, treat it like a living (and slightly messy) guest. It can shed, dry out, and sometimes leave sap or moisture where it sits.
- Add an extra protective layer at tie points, especially on painted rails.
- Watch for drip or sap spots near the top of the swag and wipe them quickly so they do not sit on the finish.
- Check it more often than faux. As it dries, it can loosen and shift.
Prevent sagging all month
Sagging usually comes from two things: too few anchor points and anchors placed only on the top rail. Here is what keeps mine looking full all season.
- Anchor the “high points” of each swag (where you want the garland to sit highest), not the lowest dip.
- Use more anchors than you think you need. It is easier to hide a few extra ties than to fix a garland that keeps slipping.
- Distribute weight. If your garland has heavy ornament clusters, place an anchor right near each cluster.
- Fluff after anchoring. Pre-lit garlands often look thinner until you fan out the branches.
If you are adding ornament picks or big bows, attach them to the garland’s wire spine first, then anchor that section to the banister so the extra weight is supported.
Pre-lit garlands and cord safety
Pre-lit garland is wonderful, but cords can turn into trip hazards fast on stairs.
- Keep cords on the wall side whenever possible, secured with cord clips.
- Avoid running cords across stair treads or anywhere feet or vacuum heads will catch them.
- Use a timer plug so you are not tugging plugs daily, which slowly loosens your setup.
- Check the garland label for indoor use and connection limits if you are linking multiple strands.
- Do not overload outlets, and replace anything with pinched, frayed, or damaged wiring.
For outdoor safety basics that also apply when you are routing lights near entry stairs, I keep this guide bookmarked: How to safely hang fairy lights outdoors.
Quick fixes
“My garland keeps sliding down the banister.”
- Add anchors closer together at the top third of the staircase where gravity wins.
- Make sure ties are grabbing the garland’s inner stem, not just outer branches.
- Add a wall-side support hook for each swag if you have a wall.
“I see little scuffs where I tied it last year.”
- This year, always use padding (felt or microfiber) under every tie.
- Use wider, softer contact points. Two smaller ties can be gentler than one overly tight tie.
- Skip metal wire directly on wood, even if it is green and pretty.
“The garland looks lumpy and uneven.”
- Start by anchoring the top and bottom, then fill in the middle.
- Keep your swags consistent in depth, like matching smiles down the staircase.
- Fluff in layers: pull branches outward, then upward, then forward toward the viewer.
“My banister is extra wide. Ties look obvious.”
- Anchor to spindles where possible.
- Hide tie points behind bows, pine picks, or thicker greenery clusters.
- Choose dark green ties or wire to disappear into the garland base.
Take it down without damage
This is where reusable ties really shine.
- Turn off and unplug lights first. Then remove any wall-side cord clips.
- Release ties gently. Do not yank the garland free. Support the garland with one hand while you open each tie with the other.
- Lift padding off slowly. If a piece sticks, wiggle it loose rather than sliding it across the finish.
- Wipe the banister. A quick dust and polish makes the whole staircase feel refreshed.
Store pre-lit garland in a roomy bin so you are not crushing branches and stressing wiring. Your future self will thank you.
More holiday decorating
If you are in full seasonal nesting mode, you might also like browsing our Seasonal & Holiday ideas. And if your garland plan turns into a whole entry moment, I love using budget-friendly styling tricks from Budget Party Hacks to make it look expensive without buying more stuff.