Flip thrifted decor into luxe-looking event props with 9 easy ideas—vases, candlesticks, frames, baskets, cake stands, mirrors, silver and books—plus a quick...
Gathova
Hardcover Books as Centerpiece Risers

Joanna Mercer
Joanna Mercer is an enthusiastic DIY event decorator and the creative spirit behind Gathova's party guides. With years of hands-on experience designing stunning tablescapes, balloon garlands, and custom photo backdrops for friends and family, she specializes in accessible, budget-friendly celebrations. Joanna loves sharing her practical tips and crafting tutorials to help anyone turn an ordinary space into a memorable party venue.
Published
I started using hardcover books as centerpiece risers years ago when I was short on vases, short on time, and trying to make a folding table look like it belonged in a cozy vintage dining room. I grabbed a few sturdy thrifted hardcovers, stacked them, and suddenly my bud vases and candles had height, layers, and that collected, storybook feeling. It is one of my favorite budget tricks because it looks intentional, not “I ran out of decor.”
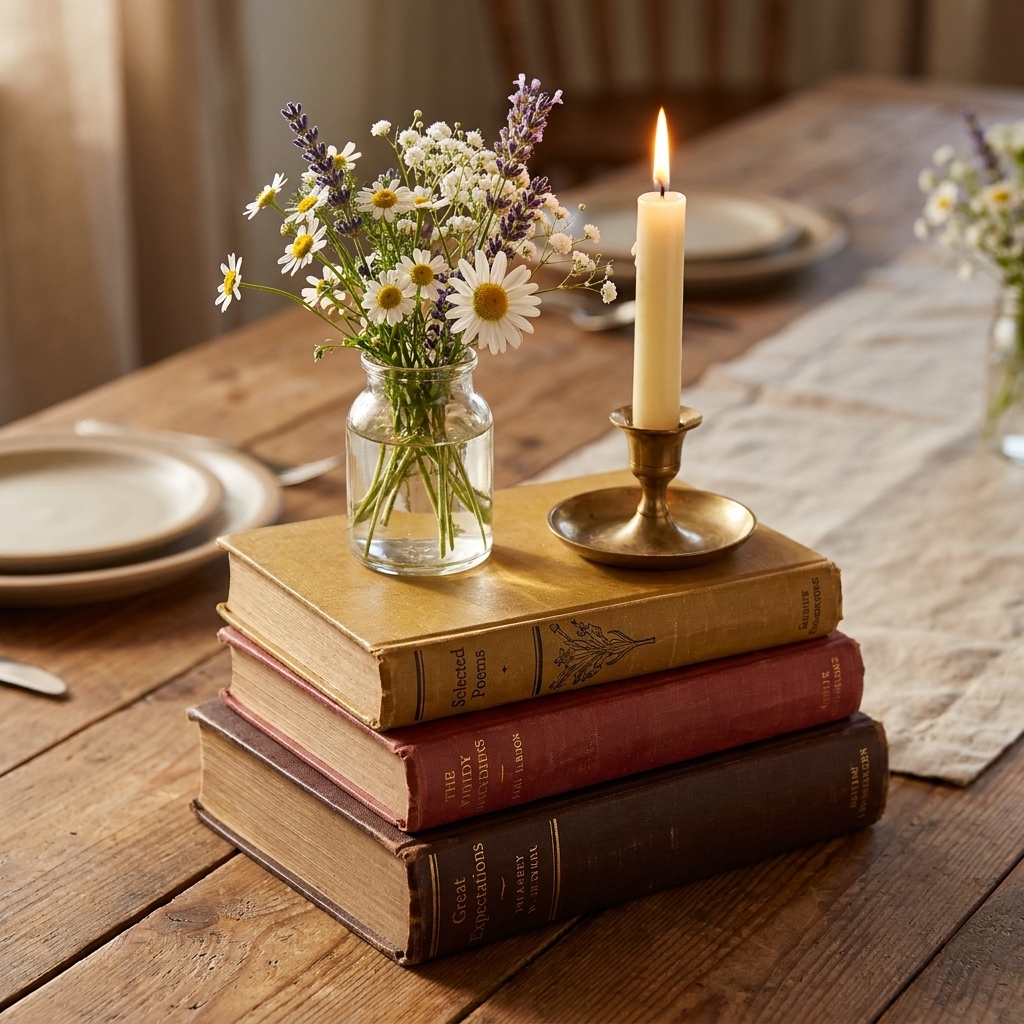
This guide covers how to source the right books, prep them so they are event-ready, and build stable stacks that add height without stealing elbow room.
Why books work as risers
In tablescaping, height is half the magic. Books create height in tidy increments, and they bring texture without requiring extra florals. A hardcover stack reads “curated” because the spines, cloth covers, and worn edges act like built-in detail.
- Budget friendly: secondhand books are often cheaper than acrylic risers or compotes.
- Easy to customize: you can wrap, band, or leave them raw depending on your theme.
- Flexible scale: a single book lifts a small bud vase, while three to five can anchor a focal arrangement.
- Perfect for vintage styling: patina looks better than perfection.
If you are building a bigger thrifted look overall, pair this trick with the ideas in Thrift Store Decor Flips: 9 High-End Event Props.
Sourcing books that stack well
Where to look
- Thrift stores and charity shops
- Library discard sales
- Used bookstores with clearance carts
- Garage sales and estate sales
- Your own shelves (with permission if it is not your house)
What makes a good riser book
Not every hardcover wants to be a table prop. Here is what I check before I buy:
- Hardcover, not paperback: paperbacks slump and bow under weight.
- Flat spine and solid boards: avoid warped covers, loose hinges, or broken spines.
- Similar footprint: stacks are most stable when the bottom book is the largest, then you step down slightly.
- Prefer matte or cloth covers: if a book has a glossy dust jacket, remove it for better grip.
- Color palette compatibility: neutrals, faded jewel tones, black, cream, navy, forest, burgundy, tan.
Titles and imagery to avoid
I love a quirky book moment, but for most events I skip anything that could distract or offend guests. In general, I avoid:
- Controversial or explicit cover imagery
- Anything with huge modern branding on the spine
- Very reflective metallic covers if you will use open flames nearby

Cleaning and prepping books
Secondhand books are charming, but they need a quick refresh before they go near food, linens, or guest outfits.
Quick clean routine
- Dry dust first: use a clean, dry microfiber cloth or a soft brush along the spine and edges.
- Spot clean covers carefully: test a hidden spot first. Use a barely damp cloth, wipe lightly, and dry right away. I skip soap on clothbound, paper-covered, or leatherette books because finishes can lift and dyes can run.
- Deodorize if needed: put books in a sealed bin with an open box of baking soda nearby (not touching) for a couple of days.
- Know when to walk away: if there is visible mold, dampness, or a strong persistent musty smell, I do not bring the book indoors or use it for events.
- Check for shedding: if the cover flakes, skip it for dining tables. It is fine for a gift table or entry display, but not near plates.
Keeping pages from fanning
Some older hardcovers puff open slightly. To keep stacks tidy:
- Use a thin ribbon around the whole book (a simple wrap and knot underneath works).
- Add a discreet clear elastic band around the book, then hide it with a ribbon if you like.
- Place the book with the spine facing outward and the page edge facing inward, so any minor fanning is less visible.
Protecting linens and surfaces
If you are working with vintage books that have any ink transfer, place a thin barrier under the bottom book:
- A sheet of kraft paper cut slightly smaller than the book
- A fabric napkin you are already using in the palette
- A thin placemat on a sweetheart table or cake table
And for anything food-adjacent, I treat books like a decorative base only. I do not set serving utensils, unwrapped food, or anything that could drip directly on them. Use a plate, tray, or board as a proper barrier.
Book styling edits
For events, “deconstructing” a book usually means removing visual clutter and making the stack behave, not ripping out pages.
Option 1: Remove the dust jacket
Dust jackets slide around, wrinkle, and catch wax drips. I usually take them off and save them at home if the book is a keeper. Removing the jacket also makes the stack look more timeless.
Option 2: Flip the orientation
Try the stack with spines facing outward, then rotate so the page edges face outward. You will be surprised how much it changes the mood. Page edges outward feels softer and more neutral.
Option 3: Wrap for a tonal look
If your books are too colorful, wrap them in kraft paper or plain cream paper and tie with ribbon or twine. This gives you the height of books without the busy spines.
Option 4: Create a safe top
If you want to place a drink dispenser, vase, or cake stand on a stack, add a top layer that is easy to wipe:
- A small glass plate
- A simple ceramic tile in a neutral color
- A small sealed board or sealed wood slice
That little surface protects the book and keeps things from wobbling.
How to stack books
Stability rules
- Largest on bottom: build a pyramid, not a totem pole.
- Limit height on dining tables: I like 2 to 4 books for guest tables. Taller stacks can block conversation.
- Keep weight centered: if you place a vase, center it. No leaning arrangements.
- Use non-slip padding: a small square of shelf liner between books makes a huge difference.
- Mind the table bump test: once it is set, gently bump the table. If anything shifts, fix it now, not after guests arrive.
Stacking formulas
1) Bud vase lift
- 1 to 2 books
- 1 bud vase
- 2 tapered candles off to the side
2) Vintage library
- 3 books in tonal colors
- A small compote or low vase on top
- A few pears or citrus tucked near the base
- Place cards leaned against the bottom spine
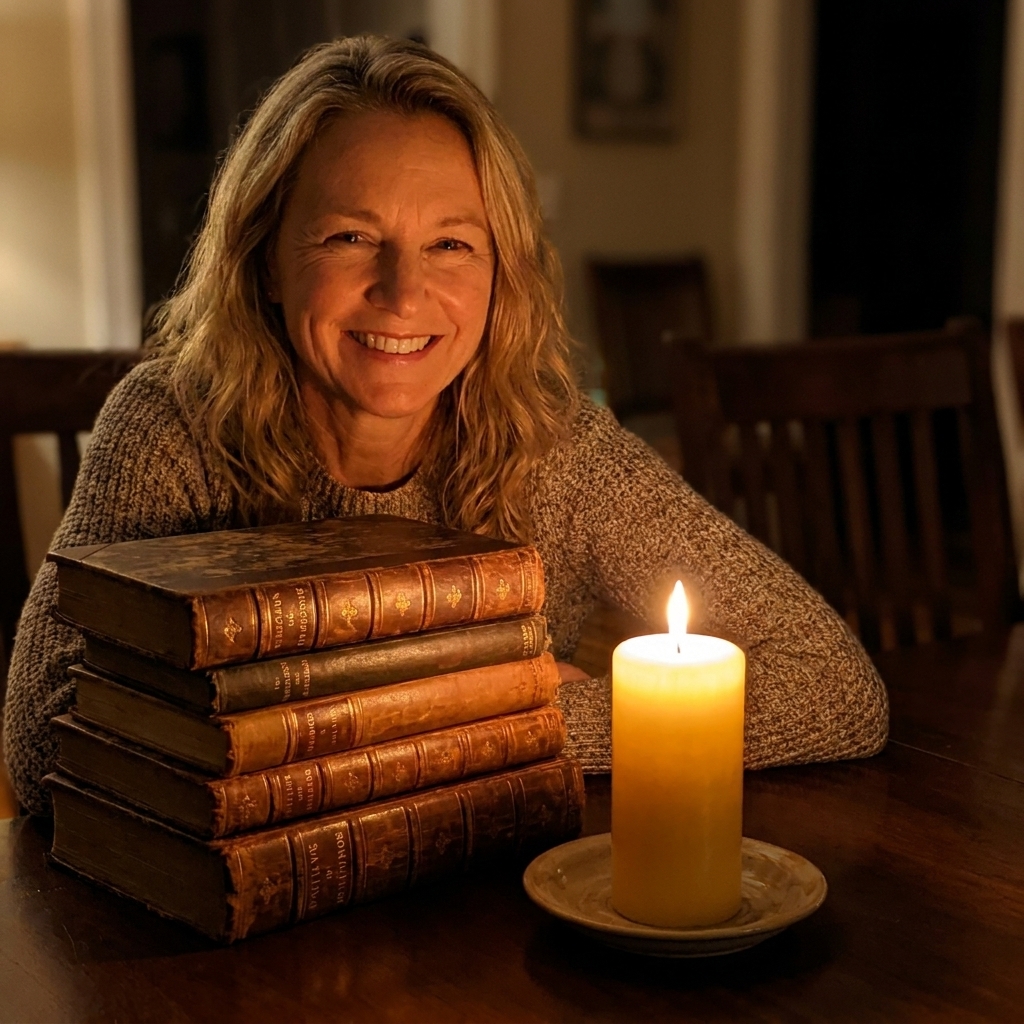
3) Candle cluster base
- 2 to 3 books
- One pillar candle on a small plate
- Two votives on the table nearby
Make it look intentional
The difference between “decor” and “stuff on a table” is editing. Here are my quick fixes:
- Repeat one color: if you have gold flatware or amber glass, choose books with warm tones or add a gold ribbon.
- Add one natural element: a sprig of rosemary, olive branch, or a single stem makes the stack feel styled.
- Vary textures: mix clothbound, leatherette, and plain paper-wrapped stacks.
- Keep the typography calm: if spines are loud, turn them inward or wrap.
If you are planning a full tablescape and want the whole table to feel cohesive, you will probably enjoy browsing Tablescapes & Centerpieces.
Candles and safety
Books are paper. Candles are fire. We can still use them together, but we do it thoughtfully.
- Follow venue rules: some venues and rentals do not allow open flames. When in doubt, plan on flameless candles.
- Use candle holders: always. No bare tapers stuck into wax on top of a book.
- Add a barrier: set candles on a small plate, coaster, or glass holder so wax cannot drip onto covers.
- Consider flameless: for kids’ parties, tight seating, or breezy outdoor dinners, LED candles give the glow with less stress.
- Keep flames away from florals: especially dried elements and ribbon tails.
Styles to try
Baby shower
- Wrap books in cream paper
- Use blush or sage ribbon
- Top with a small vase of garden flowers
Milestone birthday
- Look for black, navy, forest, and burgundy spines
- Add brass candlesticks or amber glass
- Mix in one quirky title that fits the guest of honor
Wedding
- Keep the palette consistent across tables
- Use a stack as a base for table numbers in a frame
- Build a matching stack for the card table
Holiday dinner
- Try deep green and red spines, or wrap in kraft paper
- Add pine sprigs and oranges
- Use warm candlelight and simple napkins
For more budget-minded styling ideas that layer well with this, see Budget Party Hacks.
Best uses
Great spots
- Guest tables (in shorter stacks)
- Cake table (as side risers for small desserts)
- Gift table or memory table
- Bathroom baskets and amenity trays for weddings
- Photo backdrop side tables for extra height variation
Skip them here
- Directly under sweaty drink buckets or melting ice
- Outdoor tables in damp weather unless wrapped or protected
- Buffets where food spills are likely, unless you add a wipeable top surface
If you are building a backdrop and want a budget approach that photographs beautifully, my method for plastic tablecloth styling is here: Plastic Tablecloth Photo Backdrop That Looks Expensive.
How many books to use
Here is a practical starting point for a typical 6 to 8 person dining table:
- Minimal look: 2 stacks of 2 books (4 books total)
- Balanced centerpiece look: 3 stacks of 2 to 3 books (6 to 9 books total)
- Statement look: 1 main stack of 4 books plus 2 side stacks of 2 books (8 books total)
My rule: if the table feels crowded, pull back. Height is good, but breathing room is better.
Troubleshooting
My stack keeps sliding
Add a small square of shelf liner between layers. Also check if you left glossy dust jackets on.
The books smell musty
Give them time in a sealed bin with baking soda nearby. If the smell is strong and persistent, I do not use them for dining tables. If you see any mold, I skip them entirely.
It looks messy, not vintage
Edit the colors, reduce the title clutter by turning spines inward, and add one unifying element like ribbon, a small plate on top, or matching bud vases.
Guests keep moving things
This is real. If you want less interaction, wrap the books in plain paper so they function as neutral risers.
Do I need museum putty
I usually start with shelf liner only. If you use museum putty, test it first because some finishes can lift or leave residue. I also keep it off visible covers whenever I can.
My go-to centerpiece
- Place a small stack of 3 hardcovers slightly off-center.
- Add a square of shelf liner between each book.
- Top with a small plate or coaster.
- Place a low vase with airy florals on the plate.
- Add two taper candles in holders on the table, not on the books.
- Tuck a sprig of greenery at the base.
It takes about ten minutes per table once you have your stacks ready, and it photographs like you spent way more.
If you want to see more of my decorating approach and the kind of projects I get overly excited about, you can find me here: Joanna Mercer.