Flip thrifted decor into luxe-looking event props with 9 easy ideas—vases, candlesticks, frames, baskets, cake stands, mirrors, silver and books—plus a quick...
Gathova
7 Upcycled Party Decor Ideas for Eco-Friendly Celebrations

Joanna Mercer
Joanna Mercer is an enthusiastic DIY event decorator and the creative spirit behind Gathova's party guides. With years of hands-on experience designing stunning tablescapes, balloon garlands, and custom photo backdrops for friends and family, she specializes in accessible, budget-friendly celebrations. Joanna loves sharing her practical tips and crafting tutorials to help anyone turn an ordinary space into a memorable party venue.
Published · Last updated
I grew up watching my parents turn our backyard into a full-on summer luau with whatever we already had. Old jars became candle holders, “extra” fabric turned into tablecloths, and nothing went in the trash until we had squeezed one more party out of it. That mindset stuck. These days, when I’m decorating for friends and family, I love a theme that looks polished but starts with a quick scavenger hunt through the recycle bin, the linen closet, and the thrift store bag in my trunk.
Here are seven upcycled party decor ideas that feel special, photograph beautifully, and cut down on single-use stuff.
Before you start: my quick eco-friendly party rule
If it cannot be used again, I try to make sure it can be recycled, composted, or easily passed along. The goal is not perfection. It is fewer trash bags at the end of the night.
- Choose 2 to 3 materials to repeat (glass, kraft paper, fabric, greenery). Repetition makes upcycling look intentional.
- Pick one “hero” moment (backdrop, entry table, or centerpieces). Keep everything else simple and reusable.
- Use what you have in multiples. Ten of the same jar looks like a design choice.
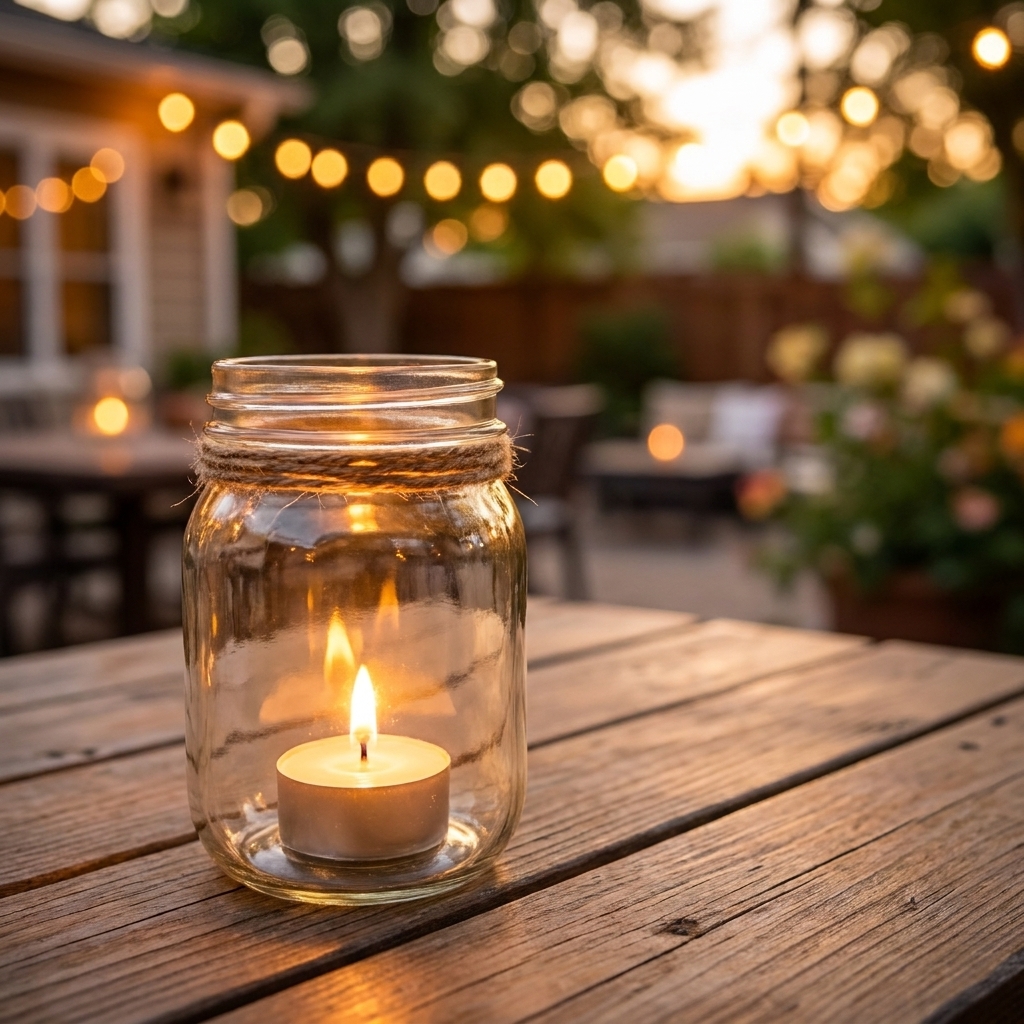
1) Glass jar lanterns (elevated, not rustic)
This is my forever favorite because it scales up fast and looks expensive when you keep the styling consistent.
What you need
- Clean glass jars (pasta sauce, salsa, jam)
- Tea lights or LED tea lights
- Twine, leftover ribbon, or scrap fabric strips
- Optional: Epsom salt, sand, or pebbles for weight
How to make them
- De-label cleanly. Soak jars in warm water with dish soap, then peel. For sticky residue, cooking oil often works. Rubbing alcohol can help too if oil does not.
- Add weight if needed. A spoonful of sand or pebbles keeps them steady outdoors.
- Wrap the neck. One material only (all twine, all velvet ribbon, all torn linen) reads cohesive.
- Cluster in odd numbers. Groups of 3 or 5 down a table look styled, not scattered.
Joanna tip: If you want the glow to feel more “wedding” than “campfire,” skip mixed jar shapes on the same table. Use one shape per surface, then mix shapes on different surfaces.
Quick safety note: If you use real flames instead of LED tea lights, give the flame plenty of clearance, keep jars away from kids and pets, and never leave them unattended.
2) Scrap fabric bunting you will actually reuse
Fabric bunting is one of those rare party crafts that stores flat, survives multiple events, and instantly makes a space feel festive.

What you need
- Scrap fabric, old sheets, or outgrown kids clothes (washed)
- Bias tape, twill tape, or a long strip of sturdy fabric for the top band
- Scissors and an iron
- Sewing machine or fabric glue
How to make it (fast method)
- Cut triangles. Aim for 7 to 9 inches tall. They do not have to be perfect.
- Press folds. Ironing is what makes “scrap” look “designed.”
- Attach to a top band. Sandwich the triangle tops inside folded tape and sew one straight line. No hemming needed.
- Keep a color rule. Choose 2 main colors plus a neutral so it looks curated.
Little detail that helps: Leave about 1 to 2 inches between flags so the strand drapes nicely instead of bunching. For a standard doorway, I like a 6 to 8 foot strand so you have a little extra to tie off.
Eco win: Unlike paper banners, this folds up and comes out every birthday, baby shower, or backyard hang.
3) Wine bottle bud vases (the easiest centerpiece upgrade)
If your friend group ever brings wine to gatherings, you already have vase inventory. A line of bottles with a few stems each looks airy and modern.
What you need
- Glass wine bottles or sparkling water bottles
- Dish soap and a bottle brush
- Optional: leftover paint, twine, or paper for wraps
- Fresh greens, baby’s breath, or a few bold stems
How to style them
- Remove labels if you want a cleaner look. A hot, soapy soak usually loosens paper labels. If you hit stubborn adhesive, a little oil or rubbing alcohol typically takes it the rest of the way.
- Unify them. All clear, all green, or all painted one color.
- Use “repeat stems.” The same flower repeated down the table reads intentional.
- Keep arrangements small. One to three stems per bottle feels chic and lets people talk across the table.
Outdoor note: If you are on a wobbly patio table, anchor bottles in a shallow tray or tuck them into a low box lid lined with a napkin. It keeps the look neat and helps prevent tipping.
If you want your florals to go further, I have a whole method for making airy filler look more luxe in How to Make Baby’s Breath Look Expensive.
4) Paper bag luminaries for pathways
Brown paper bags can look surprisingly elegant when you treat them like a lighting plan, not a craft project.

What you need
- Kraft paper bags (lunch size for tables, grocery size for pathways)
- Sand or small pebbles
- LED tea lights (recommended for safety)
How to do it
- Add weight. Pour 1 to 2 inches of sand into each bag.
- Fold the top edge once. A crisp fold looks finished.
- Insert LED tea lights. Space evenly for a clean, styled look.
Safety note: If you are tempted by real candles outside, please prioritize safety. Wind plus paper is a hard no for me.
5) Cardboard box photo backdrop panels
Big boxes from deliveries are secretly the best lightweight backdrop base. You can tape panels together, paint them, and (depending on your local rules) break them back down afterward.
What you need
- Large cardboard boxes
- Packing tape
- Paint you already own (or sample pots)
- Optional: leftover wrapping paper to “wallpaper” the surface
How to build it
- Flatten boxes into panels. Cut along one corner seam so each box opens flat.
- Make it double-thick. Tape two panels together for sturdier walls.
- Join panels like a folding screen. Tape on the front and back of the seams so it can stand with a gentle zigzag.
- Finish the surface. Two coats of paint or a clean wrapping paper cover makes it party-ready.
Recycling note: Painted or heavily taped cardboard is not accepted everywhere. If you want the option to recycle later, use minimal tape, peel it off when you are done, and check what your local recycling accepts.
If you want a more permanent stand you can reuse for years, my go-to is a simple build in DIY PVC Pipe Photo Booth Backdrop Stand.
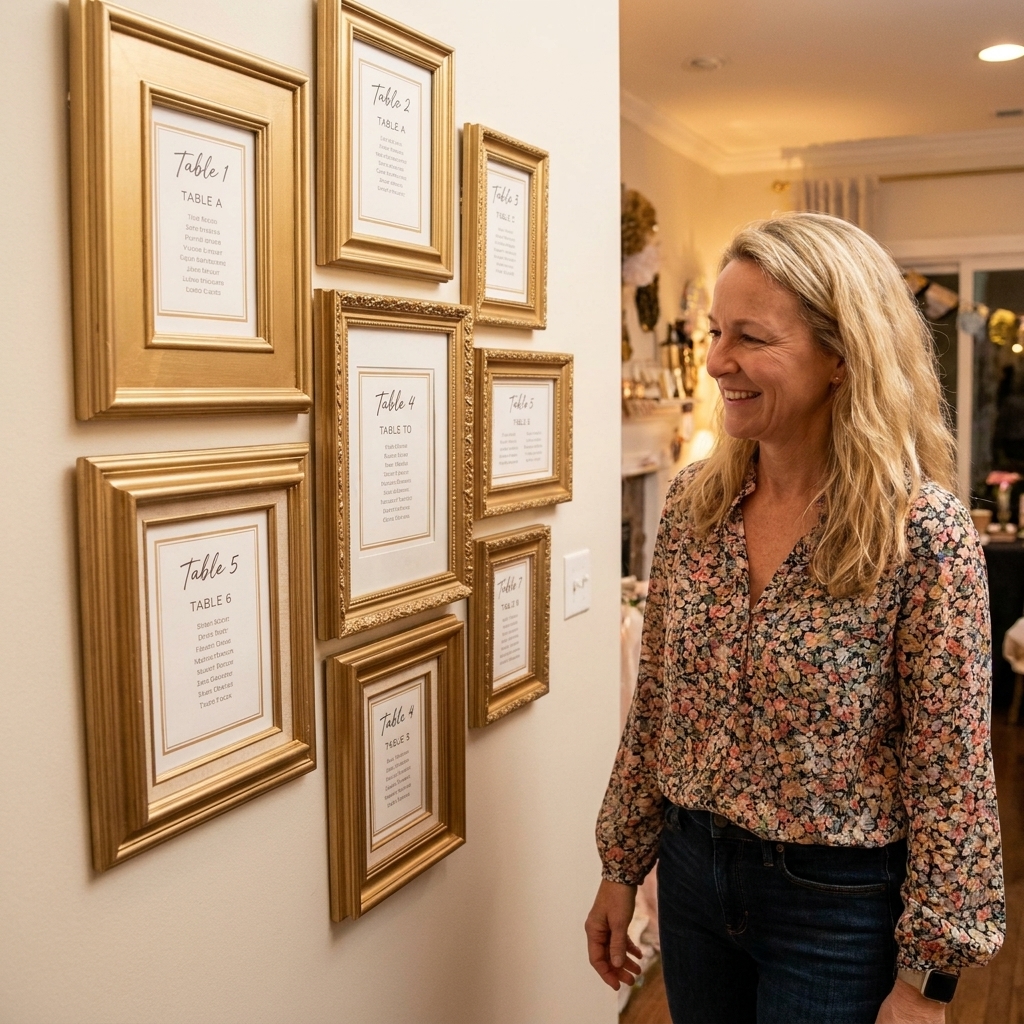
6) Thrift frames for a seating chart wall
I am a huge fan of “frame walls” because they look like a boutique event detail, but you can source the frames secondhand and keep using them.
What you need
- Thrifted frames in various sizes
- One color of paint (optional but very unifying)
- Paper inserts: menus, table numbers, or a welcome note
- Painter’s tape or removable hooks
How to pull it off
- Unify with color. Painting every frame the same shade makes the mismatch look curated.
- Use simple inserts. Black text on cream paper looks classic, and you can recycle it afterward.
- Arrange on the floor first. Snap a quick photo to remember the layout before you hang.
Storage note: I stack frames in a shallow bin with a towel between each one. It keeps the glass from scratching and makes them grab-and-go for the next event.
For more ideas on making secondhand finds look high-end, you will like Thrift Store Decor Flips: 9 High-End Event Props.
7) Refillable confetti and table scatter
Confetti is adorable and also the fastest way to create tiny trash forever. My compromise is “big confetti” you can pick up and reuse.
What you need
- Scrap fabric, leftover ribbon, or old gift wrap
- Scissors or a hole punch
- A jar or tin for storage
How to make it party-friendly
- Go larger than you think. 1 inch squares, ribbon snippets, or punched circles are easier to clean up.
- Stick to 2 colors. It reads styled, not messy.
- Collect after. Dump it back into a jar and label it for next time.
Extra eco swap: If you want that fluttery look for photos, use ribbon wands or fabric streamers instead of toss confetti. My streamer ideas live in 7 Creative Ways to Decorate With Crepe Paper Streamers.
Where to find upcycling materials
If you do not have a stash yet, you can build one quickly without buying new. I ask family to save jars for a week, swing through a thrift store for frames, and keep an eye out for sturdy boxes after big deliveries. Once you have a small “party bin,” you are set.
Cleanup that does not ruin the vibe
I love an eco-friendly plan that starts before guests arrive. Here is what makes the end of the night so much easier:
- Set out one clearly visible recycling spot near where drinks are opened.
- Use a “decor bin.” One tote for lanterns, bunting, frames, and tape means you actually keep the reusable stuff.
- Choose LED lights outdoors. Less worry, fewer accidents, and you reuse them for years. If you are hanging string lights outside, I put my safety checklist in How to Safely Hang Fairy Lights Outdoors.
My favorite upcycling supply list
- Twine and a few ribbons in neutral tones
- Removable hooks and painter’s tape
- LED tea lights
- One “party paint” color you love
- A labeled bin for jars and bottles
Upcycled decor works best when it is not a last-minute scramble. Start saving one category of item now (jars or bottles are easiest), and by your next celebration you will already have the base pieces ready to go.
If you want more budget-friendly DIYs like this, browse DIY Decor Projects or jump into my favorite roundup: Budget Party Hacks.