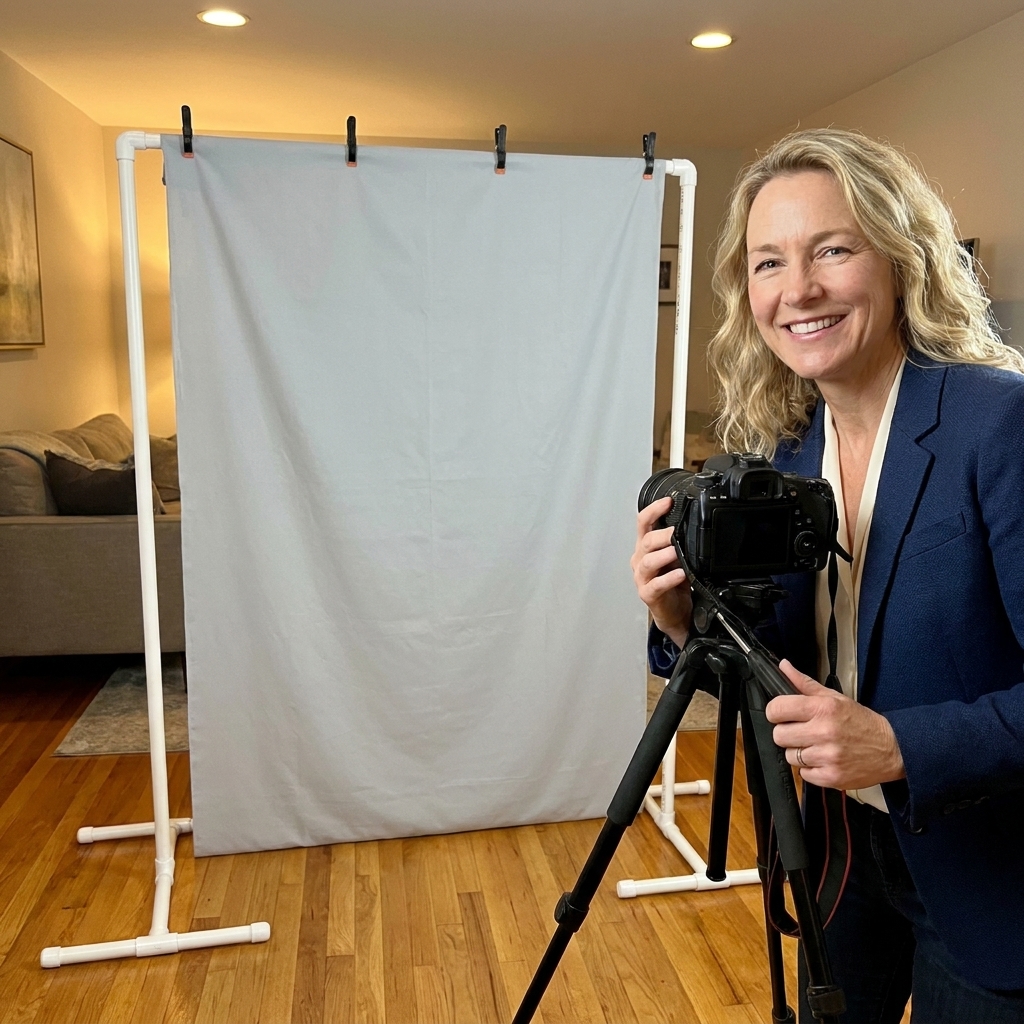
Learn how to build a sturdy, reusable PVC pipe backdrop stand for photo booths. Includes ideal sizes, a 6x7 cut list, assembly steps, and stability tips for ...
Gathova
Giant Floral Wreath Backdrops From Plain Hula Hoops

Joanna Mercer
Joanna Mercer is an enthusiastic DIY event decorator and the creative spirit behind Gathova's party guides. With years of hands-on experience designing stunning tablescapes, balloon garlands, and custom photo backdrops for friends and family, she specializes in accessible, budget-friendly celebrations. Joanna loves sharing her practical tips and crafting tutorials to help anyone turn an ordinary space into a memorable party venue.
Published · Last updated
I learned this trick the way I learn most party tricks: five minutes before guests arrive, staring at a blank wall and thinking, “Okay Joanna, be brave.” A couple of cheap hula hoops can look like craft-store chaos in the package, but once you wrap them, weight them, and cluster faux florals the right way, they read as a giant floral wreath backdrop. In photos, they look like you rented something fancy.
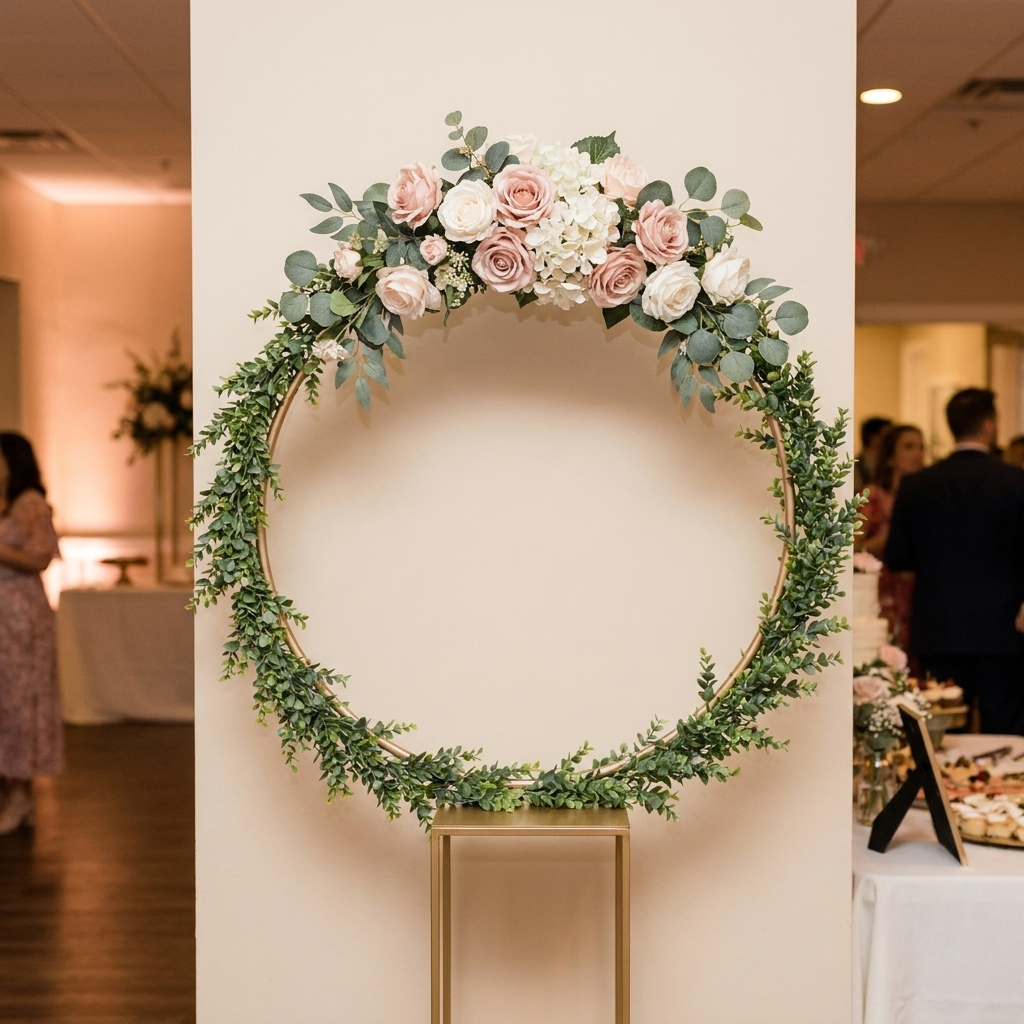
This is my go-to when I need a statement piece for a baby shower, bridal shower, graduation, or a birthday photo corner and I do not want to build a full wall. If you can use zip ties and hot glue, you can pull this off.
Timing note: Plan about 30 to 60 minutes per hoop depending on how fussy your wrapping is and how lush you make the cluster.
What you need (budget-friendly)
You can make one hoop look great, but two or three hoops layered together look intentionally styled and fill a space fast.
- Hula hoops (28 to 36 inches are easiest to handle). You can mix sizes for a nested look.
- Something to wrap the hoop: faux greenery garland, floral tape, ribbon, twine, or even cheesecloth strips.
- Faux florals in 2 to 4 sizes: one “hero” bloom, a medium bloom, filler flowers, and a little greenery.
- Zip ties (clear or green). These do the heavy lifting.
- Floral wire for extra security (optional but helpful).
- Hot glue gun for small finishing touches, not for structural holds.
- Wire cutters and scissors.
- Weighting supplies (choose one method below):
- Backdrop stand bases, C-stands, or an arch stand
- 2 heavy planters or buckets + quick-set concrete or sand
- Wood base + pipe strap clamps
- Mounting options depending on your venue: removable hooks, fishing line, or clamps.
If you are already planning balloon decor, these hoops play very nicely with an organic garland. My method for a long-lasting garland is here: DIY organic balloon arch that lasts all weekend.
Step 1: Pick the size and layout
Before you touch a glue gun, decide what you want the hoop to do.
- One hoop as a “wreath”: clean, modern, great for a small apartment wall or dessert table.
- Two hoops overlapping: my favorite. It reads high-end with very little extra work.
- Three hoops in a cluster: best for large blank walls, wide gift tables, or a bigger photo moment.
Pro tip: Lay hoops on the floor and take a quick phone photo from above. You will instantly see what looks balanced.
Proportion guideline (the part that makes it look expensive): For a 30 to 36 inch hoop, I like the main floral cluster to cover about one quarter to one third of the hoop’s circumference. Smaller than that can read sparse on camera. Bigger than that can start to look like you tried to cover the whole ring and ran out of supplies.
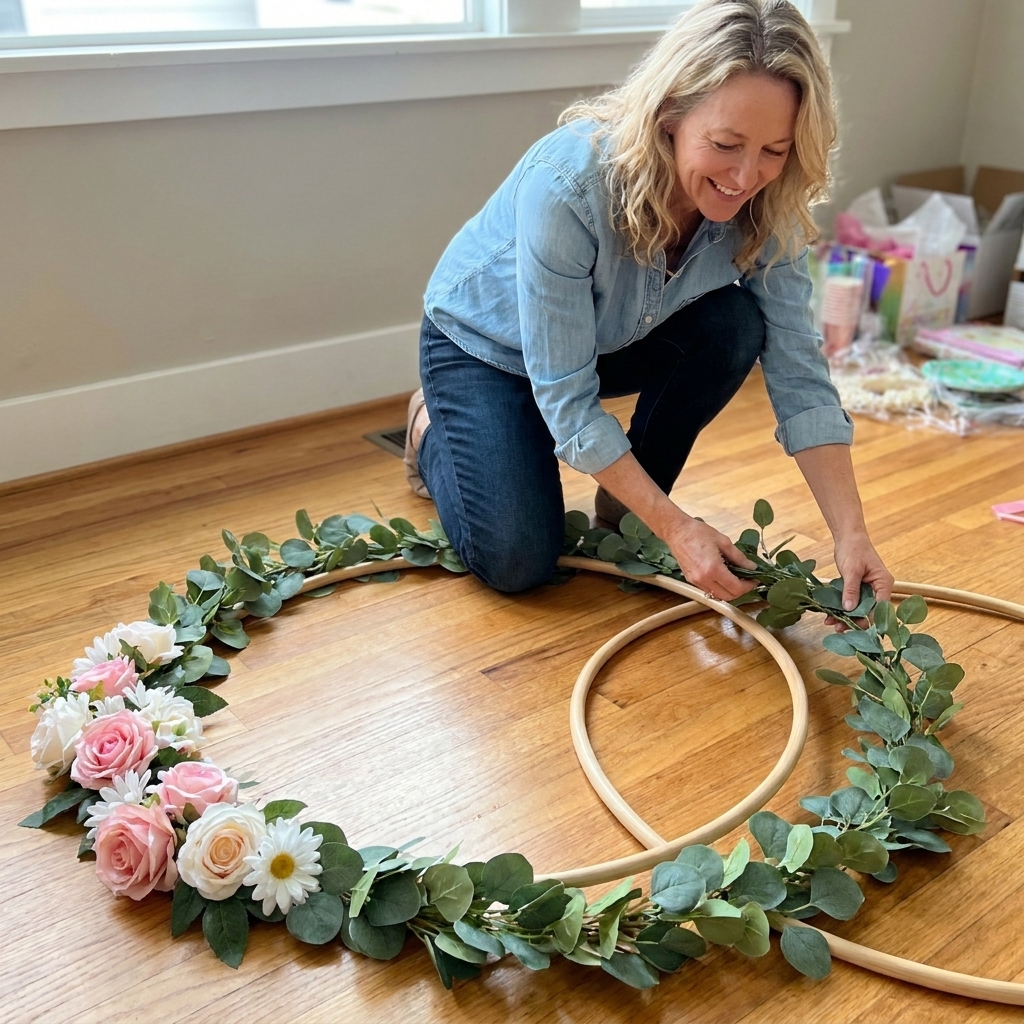
Step 2: Wrap the hoop
A bare plastic hoop catches light in a not-cute way. Wrapping also gives your zip ties something to bite into so the florals do not slide.
Option A: Faux greenery garland
- Start at the bottom or side where you want your seam to hide.
- Lay the garland along the hoop and zip tie every 6 to 8 inches.
- Overlap the garland slightly as you go so there are no gaps.
- When you reach the end, tuck the tail under the garland and secure with one more zip tie.
Option B: Ribbon or twine
- Put a dot of hot glue to anchor the start (just one dot).
- Wrap tightly at a slight angle, like wrapping an athletic handle.
- Glue the end on the back side and trim.
My reality check: Hot glue alone is not a long-term bond on slick plastic. Use zip ties or wire for anything that carries weight, then use glue for fussy finishing touches.
Step 3: Plan the flower clusters
The difference between “cute craft” and “wow, where did you rent that?” is usually cluster size and placement.
My simple cluster formula
- 1 big focal bloom (or a small group of them)
- 3 to 5 medium blooms
- Filler flowers to soften edges
- Greenery pieces that extend past the hoop for movement
Keep clusters to one side (asymmetrical) or top and bottom (balanced). If you spread flowers evenly all the way around, it can look flat and overly uniform in photos.
Photo angle trick: If your main photo spot is straight-on, place the “heaviest” part of the cluster at about the 10 o’clock or 2 o’clock position. It frames faces without eating the whole shot.
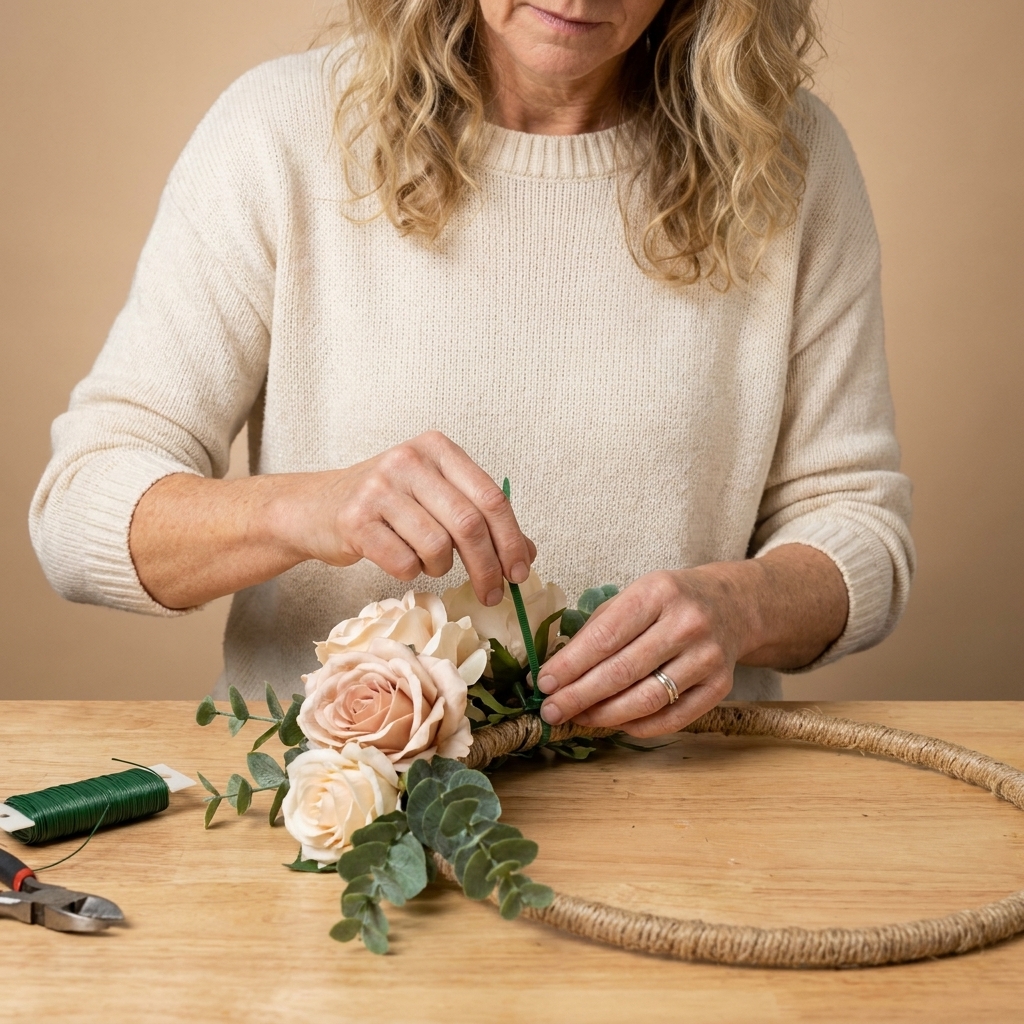
Step 4: Attach flowers securely
This is the step that keeps your wreath from shedding petals halfway through the party.
- Prep stems: Cut long stems down to 2 to 4 inches. Leave enough stem to wire or zip tie securely.
- Build a base layer of greenery: Zip tie a few greenery picks to the hoop where your main cluster will live.
- Add focal blooms: Place your largest flowers first. Zip tie around the stem and hoop. Rotate the zip tie lock to the back so it hides.
- Fill in with medium blooms: Tuck them in at different angles so the cluster has depth.
- Finish with filler: Use small pieces to cover mechanics and soften the edge where flowers meet hoop.
- Glue last: Use hot glue to lock a stubborn leaf or hide a visible plastic spot, not to hold the weight of a whole bloom.
If you want the cluster extra plush: Attach a short strip of greenery garland behind the cluster first, then build flowers on top. It creates a thicker base and hides zip ties naturally.
Step 5: Weight and mount it
A hoop backdrop fails for two reasons: it tips, or it spins. Here is how I avoid both.
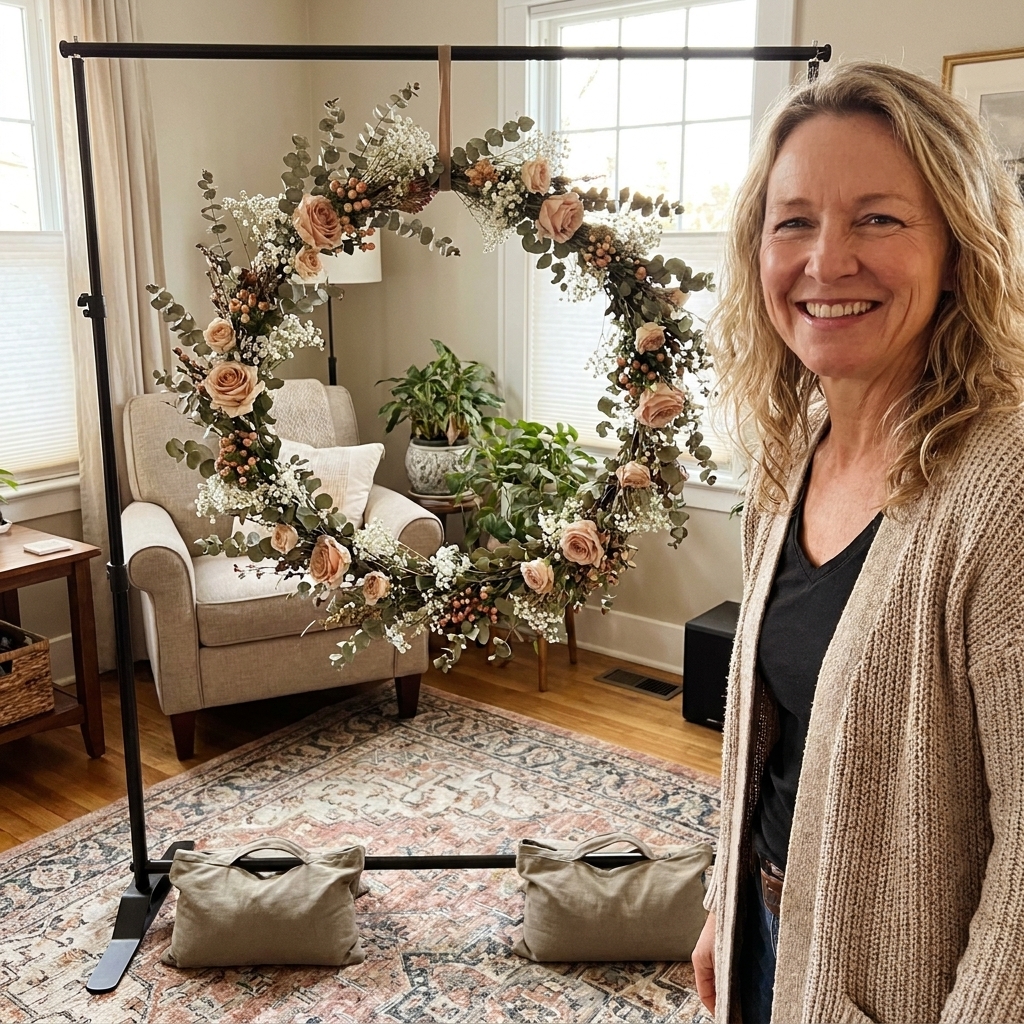
Method 1: Backdrop stand or arch stand
- Hang the hoop from the crossbar using two attachment points (fishing line, ribbon, or sturdy string). Two points stop spinning.
- Center it, then slide it slightly left or right if your floral cluster makes it feel heavy on one side.
- If you are outdoors, sandbag the stand legs or weigh them with something heavy and safe.
Method 2: Two weighted planters
- Set two large planters or buckets the same height apart.
- Insert a vertical support in each (wood dowel, PVC, or a metal pole) and weight with sand or concrete.
- Attach the hoop to the supports using pipe strap clamps or strong zip ties at two points.
Method 3: Wall or door mounting
- Use removable hooks rated for the hoop weight.
- Hang from two hooks spaced a few inches apart.
- Add a third hook at the bottom if you need to stop swinging.
Quick safety qualifier from someone who has learned the hard way: Faux florals add surprising weight. Hook ratings vary by surface, and textured walls, humidity, dust, and time can reduce hold. I avoid removable hooks on wallpaper and on freshly painted walls (paint needs time to cure). When in doubt, use a weighted stand or ask the venue before you stick anything to their walls.
For anything involving fishing line, patio posts, or outdoor hanging, I follow the same safety mindset I use for lights. If you need a careful, weather-friendly approach, this helps: how to safely hang fairy lights outdoors.
Step 6: Make it feel bigger
If your hoop feels a little small against a big wall, you do not need to start over. Add supporting actors.
- Layer a second hoop behind it slightly offset, even if the second hoop is just wrapped and mostly plain.
- Add vertical drape behind the hoops: fabric panels, tulle, or a curtain you already own. If you love ceiling draping tricks, you will probably enjoy: budget ceiling draping with tulle and fishing line.
- Use a grounded element at the base: a small table, a gift pedestal, or a low cluster of balloons to visually connect the hoop to the floor.
- Choose a bolder flower scale: bigger blooms read better from 6 to 10 feet away, which is where most photos happen.
Palettes that photograph well
I keep palettes simple so the hoop reads as one big statement piece, not a busy craft project.
- Blush, white, and soft greenery for showers and brunch parties.
- Terracotta, rust, and dusty rose for boho themes and fall birthdays.
- All greenery with a few white blooms for modern, minimal events.
- Bright tropical (hibiscus colors plus monstera leaves) for summer parties. If you are leaning that way, this theme is so fun: tropical luau party decor with real pineapples and monstera leaves.
My thrifty tip: Use premium-looking flowers only where the camera will focus, usually top left or top right. Then fill the rest with greenery and smaller filler picks.
Common problems
The hoop keeps spinning
- Hang it from two points, not one.
- Add a discreet stabilizer: a thin line from the bottom of the hoop to the stand base or a third wall hook.
It looks sparse
- Double up greenery under the flowers.
- Use one extra filler type (baby’s breath-style sprays, mini daisies, or wax flower lookalikes).
Florals droop or slide
- Zip tie stems to the hoop, then cover the tie with greenery or a leaf.
- If the hoop is slick, wrap it first with floral tape or ribbon to add grip.
The plastic hoop is showing
- Wrap more tightly and overlap your wrap material.
- Hide the seam behind your largest cluster.
Hot glue is getting soft
- If your setup is sitting in direct sun, a hot car, or a heat-blasting patio, assume hot glue will loosen.
- Use zip ties and wire as your real structure, then treat glue like makeup, not the skeleton.
My go-to party setup
If you are placing this at a party, here is the layout I keep coming back to because it works for photos and traffic.
- Backdrop goes slightly off-center behind a small table (cake, guest book, or favors).
- Leave 3 to 5 feet clear in front so people can step back for photos.
- Light it softly from the front (a lamp or ring light out of frame), not from behind.
If you want the table styling underneath to look just as polished, I always reference my own layering basics before I start stacking pretty things: layer chargers, plates, and napkins like a pro.
FAQ
Can I do this without a backdrop stand?
Yes. Indoors, two strong removable hooks (two hanging points) is usually enough if your surface allows it. Outdoors, I strongly prefer a weighted stand because wind will bully a lightweight setup.
How many faux flowers do I need for one hoop?
For a 30 to 36 inch hoop, a lush one-sided cluster often takes 8 to 16 stems, but it depends a lot on what “a stem” means. One stem might be a single rose, or it might be a spray with five blooms. It also depends on whether you are doing one cluster or two. When I am unsure, I buy extra greenery first and let that carry the volume.
Will hot glue melt or fail?
In heat like direct sun or a hot car, hot glue can soften. That is why I use zip ties and wire for structure, then glue only for tiny finishing touches.
Can I reuse it?
Absolutely. Cut zip ties carefully when you are done, store the hoop flat or hang it in a closet, and keep the florals in a bin. This is one of my favorite reusable big-impact party props.